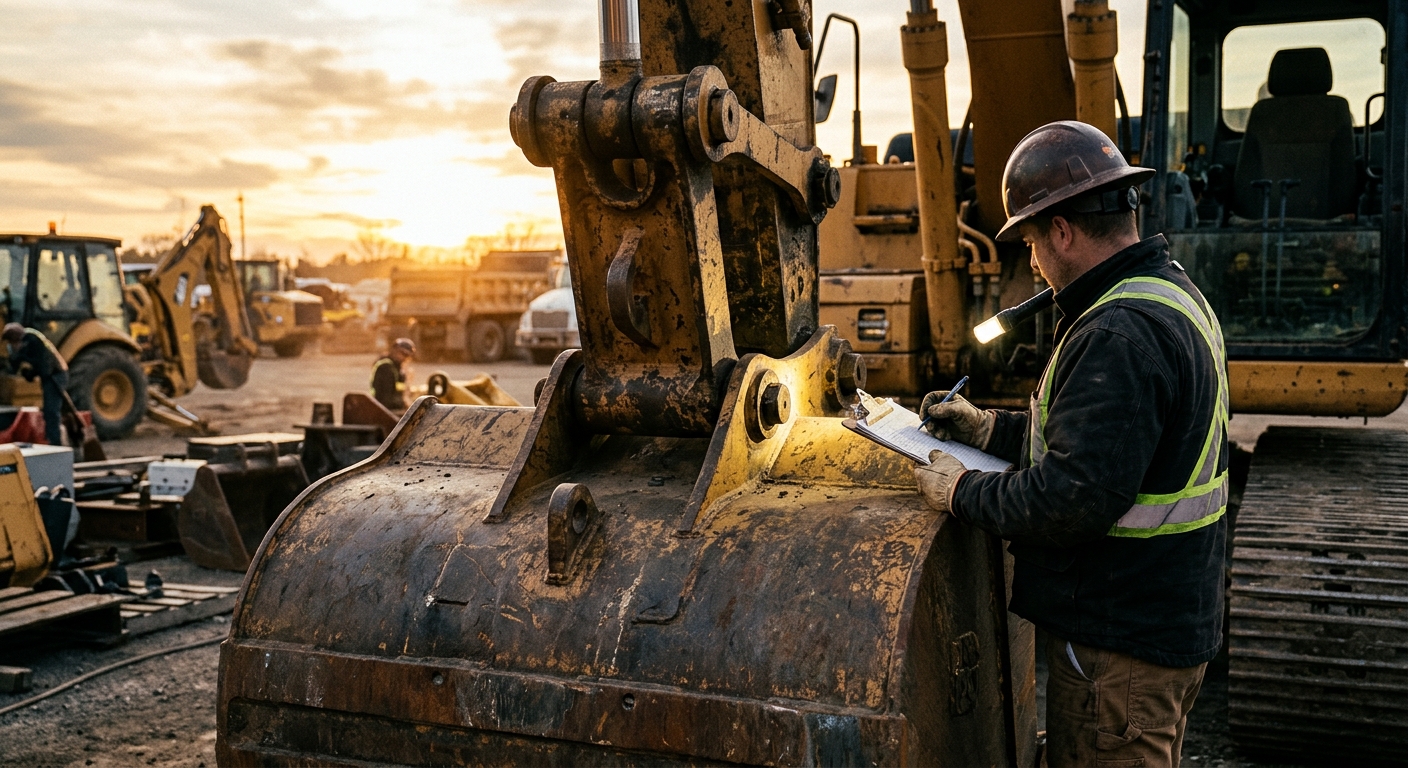
Heavy Equipment Counterweight Inspection Guide: Cracks, Loose Bolts, and Swing-Zone Risks
Learn how to inspect heavy equipment counterweights for cracks, loose mounting hardware, impact damage, and transport risks before they turn into safety incidents.
Key Takeaways:
- Counterweights are structural safety components, not decorative chunks of steel on the back of the machine
- Small cracks, elongated bolt holes, and rust streaking around mounts usually show up before a major failure
- Rear-end collisions, trailer chain contact, and repeated swing impacts can quietly damage counterweights and their brackets
- Missing hardware or a loose counterweight changes machine balance, increases vibration, and creates a real struck-by hazard
- A simple documented inspection routine helps crews catch problems before they become downtime, transport delays, or OSHA conversations
Why Counterweights Deserve Their Own Inspection
Counterweights rarely get attention until something has already gone wrong. Most crews focus on tracks, tires, leaks, filters, and attachments because those are the parts that obviously wear out. The counterweight sits in the background, covered in dust and usually hidden from the operator’s line of sight, so it becomes easy to treat it like permanent dead weight.
That is a mistake.
On excavators, cranes, wheel loaders, telehandlers, and forklifts, the counterweight is part of the machine’s balance system. It helps manage tipping forces, stabilizes the chassis during lifting and digging, and absorbs a surprising amount of abuse from daily operations, transport, and cramped jobsites. If it loosens, cracks, shifts, or loses mounting integrity, the problem is not just cosmetic. It can affect operator feel, machine stability, structural life, and worker safety around the swing radius.
The ugly part is that counterweight problems are often ignored because the machine still “works.” It still starts, still swings, still digs, and still loads trucks. Meanwhile, the warning signs get louder: a new rattle in the upper structure, shiny witness marks around hardware, hairline cracking in paint, or an operator reporting that the machine feels rough when rotating. Those clues matter. They are usually the cheap stage of the problem.
What a Counterweight Actually Does
The simplest explanation is this: a counterweight opposes load and movement forces trying to tip or destabilize the machine. On an excavator, it offsets the boom, stick, bucket, and load out in front of the center pin. On a crane or telehandler, it supports lifting geometry and rated capacity. On a forklift, it is fundamental to the machine’s safe design.
That means the counterweight does three jobs at once:
- It preserves balance during lifting, digging, and reaching.
- It reduces stress concentration elsewhere in the machine by keeping loads within design assumptions.
- It creates a large rear hazard zone that other workers have to respect.
If the counterweight itself is damaged or its hardware is loose, you can end up with more than one type of failure at once. The machine may vibrate more. The operator may notice new sway or harshness. Rear clearance becomes more dangerous because pieces can project, shift, or separate. Transport dimensions may even change if bodywork or guards around the counterweight are bent out of place.
Machines Where Counterweight Condition Matters Most
Almost every fleet has at least a few machines where counterweight condition deserves extra attention.
Excavators: Tight sites, demolition work, and truck-loading create lots of opportunities for rear-end contact. Tail swing areas also put ground workers at risk if the machine backs or swings into obstacles.
Cranes: Counterweight configuration directly affects capacity. Missing, incorrect, or damaged components are not minor discrepancies. They can shut a job down fast.
Telehandlers and forklifts: Rear ballast is fundamental to machine stability. Repairs or modifications here should never be improvised.
Wheel loaders and dozers with rear add-ons or guarding: Even when the rear ballast is less obvious, mounts, plates, and structural attachments can loosen or crack over time.
The Most Common Counterweight Failure Modes
Most counterweight issues fall into a few predictable categories.
1. Loose or missing mounting hardware
This is the classic one. Bolts back off, washers disappear after prior repairs, or hardware gets reused when it should have been replaced. Once a counterweight starts moving microscopically, the movement accelerates wear in the mount surfaces and bolt holes.
Look for:
- shiny metal around bolt heads or clamp surfaces
- rust bleeding from seams
- black dust around mounts from movement
- witness marks that no longer line up
2. Cracking around mounts or brackets
Cracks often begin in paint, weld toes, or corners where loads concentrate. If you can catch them while they are still hairline and localized, repair planning is manageable. Ignore them, and they grow into structure work, downtime, and potentially manufacturer review.
3. Impact damage
Counterweights get backed into more objects than most operators want to admit. Trailer dovetails, bollards, retaining walls, stockpiles, and even other machines can deform covers, chip cast material, or tweak the supporting structure.
4. Corrosion and trapped debris
Mud and salt packed into rear cavities create the kind of corrosion that hides until a panel comes off. Fleets in snow regions or near deicing chemicals should watch this closely.
5. Unauthorized repair or modification
Torch-cut brackets, questionable weld build-up, drilled holes, and homemade plates are all red flags. A counterweight system is not the place for backyard engineering.
What Usually Means “Stop and Escalate”
- ✅ Fresh cracks near mount points
- ✅ Missing or broken hardware
- ✅ Elongated holes or obvious movement marks
- ✅ Rear impact followed by new vibration or noise
- ✅ Any unapproved weld repair on ballast or supporting structure
What Might Be Cosmetic Only
- ❌ Surface paint chips with no metal distortion
- ❌ Minor scuffs from normal use
- ❌ Dirt or grease buildup before cleaning and reinspecting
- ❌ Light surface rust away from structural connections
Daily Walkaround Inspection Checklist
A daily counterweight check takes two minutes if the crew knows what to look for. The goal is not deep diagnosis. The goal is catching obvious change.
Start at the rear of the machine before startup:
- Stand back and verify the counterweight sits square and visually centered.
- Check for fresh chips, dents, scrapes, or contact marks from the last shift.
- Look under and around the mount area for loose hardware, missing retainers, or fallen fragments.
- Inspect seams and brackets for rust streaks, cracked paint lines, or shiny movement marks.
- Verify rear lights, cameras, alarms, and guarding near the counterweight are intact. Damage here often means the counterweight area took a hit.
- Ask the operator one simple question: “Did it feel different yesterday?”
That last question matters more than people think. Operators notice new rattles, harsh swing stops, and odd balance sensations before supervisors do.
Weekly and Monthly Inspection Routine
The weekly or monthly version is where real prevention happens. Clean the area first. Dust and dried mud hide everything worth seeing.
After cleaning:
- Inspect every visible fastener and retainer in the counterweight and rear-frame area.
- Check torque on accessible hardware per manufacturer spec.
- Use a flashlight to inspect weld toes, corners, and plate transitions.
- Look for uneven gaps between the counterweight, frame, covers, and guards.
- Inspect adjacent structure: engine doors, radiator guards, rear camera mounts, handrails, and access steps.
- Review recent repair history. Repeat loosening usually means root cause was missed.
If the machine recently had a transport incident, rollover scare, rear impact, or heavy vibration complaint, increase the inspection depth immediately instead of waiting for the next scheduled service.
Example: Mid-Size Excavator After Trailer Contact
A contractor noticed chipped paint on the rear counterweight after loading out late on a Friday. The machine still worked, so nobody stopped production. Three days later, the operator reported a metallic knock during swing deceleration. Inspection found two loosened mount bolts and fretting marks around the bracket faces. The repair ended up being a same-day hardware replacement and torque verification.
If the crew had ignored the knock for another week, the likely next step was elongated holes and bracket repair instead of a simple service call.
When Damage Is Cosmetic vs Structural
Fleet owners waste money when they panic over every scuff, but they lose a lot more when they dismiss structural warnings as cosmetic.
Cosmetic damage usually stays in the paint or cover layer. Structural damage affects geometry, attachment security, or the material itself. The problem is that structural damage often starts looking cosmetic from ten feet away.
Use this filter:
- Cosmetic: paint scrape only, no deformation, no crack pattern, no mount movement, no operator complaint.
- Needs closer inspection: repeat contact in the same area, localized denting near mounts, fresh rust line, or a new gap between panels.
- Out of service until evaluated: cracked mount area, missing hardware, visible shifting, chunked cast material near connection points, or impact followed by changed machine behavior.
Transport and Jobsite Risk Points
Counterweights get damaged in transport almost as often as they do during operation. Tight trailer clearances, aggressive loading angles, and rushed securement routines are the usual culprits.
Watch these risk points:
- Loading and unloading: rear overhang contacting ramps, beavertails, or trailer structure
- Chain and binder placement: securement gear rubbing against painted or machined surfaces
- Excavator orientation: tail swing clearance forgotten during trailer positioning
- Tight jobsites: operators rotating into walls, containers, trucks, or fencing
- Storage yards: machines parked so close that one swing or backing move creates contact
The best prevention is not fancy. It is discipline. Mark loading reference points. Use spotters when clearance is tight. Standardize securement locations. Document every impact, even when the machine appears fine.
Repair, Replacement, and Documentation
When you find a real counterweight issue, the next move should be controlled documentation, not guesswork.
Record:
- machine ID, hours, and date
- exact location of the damage
- clear photos from wide and close angles
- whether the issue followed impact, transport, or vibration complaints
- hardware condition and any torque findings
Then decide whether the problem is a service item, a fabrication review, or a manufacturer/dealer escalation. Some issues are as simple as replacing specified hardware and monitoring for recurrence. Others require crack-stop drilling, NDT, line-boring adjacent structure, or full component replacement. The key is not pretending those are all the same category.
If a problem repeats after repair, stop blaming luck. Repeating hardware loosening usually points to one of four things: wrong torque procedure, damaged mating surfaces, distorted brackets, or a deeper structural load issue upstream.
Example: Loader Fleet Pattern You Should Not Ignore
If three machines in the same loader class keep showing loose rear hardware after 1,000 to 1,500 hours, that is not random. It may be operator pattern, route condition, or a known design weak point. Tracking the repeatability is what turns maintenance from guesswork into fleet intelligence.
How FieldFix Helps Track Repeating Issues
Counterweight problems are exactly the kind of issue that gets lost in text messages, verbal handoffs, and dusty shop notebooks. FieldFix helps by giving crews one place to log impact damage, attach photos, record repeat inspections, and compare what keeps happening across machines.
That matters because the biggest value is not the first repair. It is spotting patterns:
- the same machine getting rear-end impact every month
- the same operator reporting swing harshness after transport
- the same hardware backing off after each service interval
- the same yard layout causing avoidable clearance damage
Counterweights are simple until they are expensive. A disciplined inspection process keeps them in the simple category.
Stop Losing the Small Clues
FieldFix helps fleets document impacts, log follow-up inspections, and catch repeating structural issues before they become ugly downtime.
Start free and see how FieldFix turns scattered maintenance notes into trackable machine history.
Related Articles
September 4, 2026
Heavy Equipment Fall Service Planning Guide: How to Prevent Winter Downtime
September 3, 2026
Horizontal Directional Drill Maintenance: The Complete HDD Service Guide for Contractors
September 2, 2026