Heavy Equipment Field Welding Repair Guide: Essential Skills Every Operator Should Know
Learn field welding repair techniques for heavy equipment. Covers common weld fixes, safety protocols, when to DIY vs. call a pro, and equipment you need.
Key Takeaways
- Field welding can save thousands in downtime costs by fixing minor cracks, brackets, and wear plates on-site
- Stick welding (SMAW) is the most practical process for field repairs on heavy equipment
- Not every crack should be welded — structural failures, high-stress pivot points, and boom/arm damage need professional evaluation
- Proper surface prep is 80% of getting a good field weld on dirty, oily equipment
- A basic field welding kit costs $500–$1,500 and pays for itself after one or two repairs
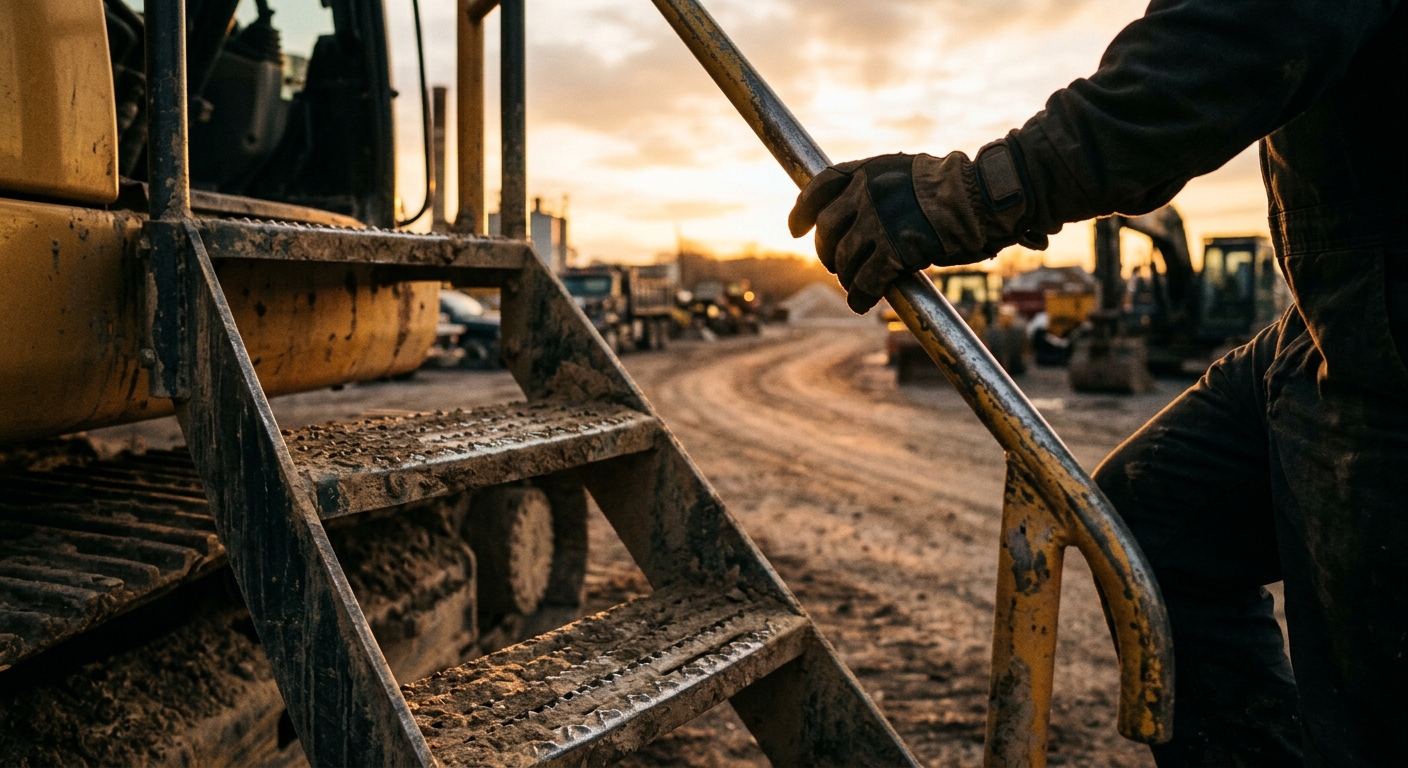
You’re three hours into a land clearing job when you hear it — a sharp crack from the bucket. One of the wear plates has split. The nearest welding shop is 45 minutes away, and the tow alone will cost $800. But if you’ve got a welder on the trailer and know the basics, you’re back to work in under an hour.
Field welding isn’t about becoming a certified pipe welder. It’s about having enough skill to handle the minor repairs that would otherwise shut you down for a day or more. For heavy equipment operators and small fleet owners, basic welding knowledge is one of the highest-ROI skills you can develop.
Why Field Welding Matters for Equipment Owners
Downtime is the silent profit killer in heavy equipment operations. Every hour your machine sits idle costs you money — not just in lost production, but in missed deadlines, crew standing around, and potential contract penalties.
The math is straightforward. If you can handle even two or three field repairs per season yourself, you’ve saved enough to cover the cost of a decent portable welder — and then some.
Beyond the financial argument, there’s a practical one: availability. Mobile welders are in high demand, especially during peak construction season. When everyone’s machines are running hard and breaking down simultaneously, wait times for a qualified mobile welder can stretch to days, not hours.
Common Heavy Equipment Weld Repairs
Not all welding repairs are created equal. Some are straightforward fixes that any operator with basic welding skills can handle. Others require professional expertise and should never be attempted in the field.
Repairs You Can Handle in the Field
Wear plate replacement and repair: Wear plates on buckets, blades, and cutting edges take constant abuse. Cracked or worn plates are the most common field weld repair and among the easiest. You’re welding flat plate to flat plate with good access — ideal conditions for a field repair.
Bracket and mount repairs: Steps, handrail mounts, light brackets, and accessory mounts crack or break regularly. These are low-stress structural elements that are forgiving of less-than-perfect welds.
Guard and shield repairs: Belly pans, track guards, and engine compartment shields get beaten up by rocks and debris. Patching holes or re-attaching torn guards is basic work.
Reinforcement plates: Adding reinforcement to areas showing early signs of stress — before they become full failures — is smart preventive maintenance.
Tooth adapter and lip shroud repairs: Building up worn tooth adapters or re-attaching lip shrouds on excavator and loader buckets is common and relatively simple.
Repairs That Need a Professional
Never attempt these repairs in the field without professional evaluation:
- Boom or arm cracks — These are high-stress structural members. A bad weld here can lead to catastrophic failure.
- Pivot pin bores — Require precise machining and specialized welding techniques.
- Hydraulic cylinder rods — Need hard-chrome overlay and precision grinding.
- Frame cracks on articulated machines — Structural integrity of the entire machine depends on these joints.
- Turntable and swing bearing mounts — Complex geometry and high cyclic loads make these dangerous DIY territory.
Choosing the Right Welding Process
There are four main welding processes, but for field repairs on heavy equipment, the choice usually comes down to two.
Stick Welding (SMAW) — Best for Field Repairs
Pros:
- Works in wind, rain, and dirty conditions
- No shielding gas to carry or run out of
- Handles rusty, painted, and contaminated surfaces better
- Equipment is portable, rugged, and affordable
- Wide range of specialty electrodes available
- Runs off generator power easily
Cons:
- Slower than wire-feed processes
- More slag cleanup required
- Steeper learning curve for beginners
- More spatter and less aesthetic welds
MIG/Flux-Core Welding (GMAW/FCAW)
Pros:
- Faster deposition rates
- Easier to learn basic technique
- Cleaner welds with less cleanup
- Better for thin materials
Cons:
- Wind blows shielding gas away (MIG)
- Equipment is heavier and less portable
- Wire feed mechanisms can jam in dusty environments
- Gas bottles add weight and logistics
- Flux-core wire is a good compromise but costs more
Our recommendation: Start with a stick welder for field repairs. It’s more forgiving of the real-world conditions you’ll face — wind, dirt, rust, and imperfect positions. Once you’re comfortable, consider adding a multi-process machine that also handles flux-core wire for faster repairs in sheltered conditions.
Essential Field Welding Equipment
Building a field welding kit doesn’t require a massive investment. Here’s what you need to get started, organized by priority.
Must-Have Equipment
| Item | Estimated Cost | Notes |
|---|---|---|
| Portable stick welder (200A+) | $300–$800 | Inverter-style for portability |
| Auto-darkening welding helmet | $50–$200 | Don’t cheap out on this |
| Welding gloves (heavy duty) | $20–$40 | Leather gauntlets for stick welding |
| Welding jacket or sleeves | $30–$80 | FR-rated cotton or leather |
| Electrode assortment (6011, 7018, 7024) | $40–$80 | Keep sealed until use |
| Chipping hammer and wire brush | $15–$25 | For slag removal |
| Angle grinder with grinding/cutting discs | $60–$120 | Essential for prep and cleanup |
| Welding clamps (various sizes) | $30–$60 | C-clamps and locking pliers |
| Fire extinguisher (ABC rated) | $25–$40 | Non-negotiable safety item |
Nice-to-Have Additions
- Portable welding table or magnetic squares for alignment
- Electrode oven or storage container (keeps 7018 dry)
- Welding magnets for holding pieces in position
- Soapstone markers for layout
- Portable generator (if machine power isn’t available)
Power tip: Many heavy equipment machines have auxiliary power outlets or can power a welder directly through the alternator system. Check your machine’s manual — you might already have a power source on-site without needing a separate generator.
Surface Preparation: The Key to Good Welds
Here’s the truth that separates a weld that holds from one that cracks in a week: preparation matters more than technique. Heavy equipment is covered in grease, oil, paint, rust, and dirt — all of which are enemies of a good weld.
The 4-Step Prep Process
1. Degrease the area. Use a solvent or brake cleaner to remove oil and grease in a 6-inch radius around the repair area. Oil contamination causes porosity (gas pockets) in the weld that weaken it dramatically.
2. Grind to clean metal. Use your angle grinder with a flap disc or grinding wheel to remove paint, rust, and scale down to bright, shiny metal. For crack repairs, grind a V-groove along the crack to allow full penetration.
3. Check for thickness. Before welding, assess the base metal thickness. If corrosion has thinned the metal significantly, welding may not be the right fix — you might need to replace the entire section.
4. Preheat when necessary. Thick sections (over 1 inch) and high-carbon steels benefit from preheating to 200–400°F before welding. This slows the cooling rate and prevents hydrogen cracking. A propane torch works for field preheating.
Critical safety step: Before striking an arc near any hydraulic components, disconnect or depressurize the hydraulic system. Welding heat near pressurized hydraulic lines can cause catastrophic failures, fires, and severe burns. Also drain fuel from any nearby tanks and ensure no flammable vapors are present.
Step-by-Step Field Repair Process
Let’s walk through a typical field repair — replacing a cracked wear plate on an excavator bucket.
Example: Bucket Wear Plate Repair
Situation: A 3/8” wear plate on the bottom of your excavator bucket has cracked and is curling up, catching on material and slowing production.
Time estimate: 45–60 minutes
Step 1: Assess and plan. Examine the crack. Is it just the wear plate, or has the bucket shell underneath also cracked? If just the wear plate, this is a straightforward repair.
Step 2: Remove the damaged section. Use your angle grinder with a cutting disc to remove the cracked wear plate. Cut back to solid, undamaged metal — don’t try to save material that’s already compromised.
Step 3: Prepare the surface. Grind the bucket shell clean where the new plate will sit. Remove all rust, paint, and debris. The cleaner the surface, the better the weld.
Step 4: Cut and fit the new plate. If you carry spare wear plate material (you should), cut a replacement piece. Fit it in place and check alignment. A gap of 1/16” or less is ideal.
Step 5: Tack weld in position. Place 3–4 small tack welds to hold the plate in position. Check alignment again — once you start the full weld, you’re committed.
Step 6: Weld it down. Using 7018 electrodes (3/32” or 1/8”), run stringer beads around the perimeter. For wear plates, a fillet weld on all four sides provides the best durability. Use a weave pattern on wider joints.
Step 7: Clean and inspect. Chip slag, wire brush the welds, and visually inspect. Look for undercut, porosity, or incomplete fusion. Grind any high spots that might catch material.
Step 8: Get back to work. Let the weld cool for 10–15 minutes before putting it back under load. No quenching with water — let it air cool naturally.
Safety Protocols for Field Welding
Field welding introduces hazards that shop welding doesn’t. You’re working in uncontrolled environments with fuel, hydraulic oil, dry vegetation, and no ventilation systems.
Non-Negotiable Safety Rules
-
Clear a 35-foot radius of dry grass, leaves, and combustible materials before welding. Field fires from welding sparks are a real and common danger.
-
Have a charged fire extinguisher within arm’s reach. Not on the truck. Not in the toolbox. Within arm’s reach, ready to grab.
-
Disconnect the battery before welding on the machine. Welding current can damage ECUs, sensors, and electronic control modules. On modern Tier 4 machines, this is especially critical — a fried ECU can cost $5,000–$15,000.
-
Never weld on or near pressurized systems. Depressurize hydraulics, relieve air tank pressure, and ensure fuel systems are isolated.
-
Ventilation matters even outdoors. Welding galvanized steel, painted surfaces, or materials with unknown coatings can release toxic fumes. Position yourself upwind and wear a respirator when burning off paint or coatings.
-
Post-weld fire watch. After welding, monitor the area for at least 30 minutes. Smoldering grass or insulation can ignite long after you’ve stopped welding.
Arc flash is no joke. Even a few seconds of exposure to a welding arc without proper eye protection can cause arc eye (photokeratitis) — an incredibly painful condition that feels like sand in your eyes. Always wear your helmet, and warn nearby workers before striking an arc.
When to DIY vs. Call a Professional Welder
Knowing your limits is just as important as knowing how to weld. Here’s a practical decision framework:
Handle it yourself if:
- The repair is on a replaceable wear component (plates, teeth, guards)
- The failure is in a low-stress area (brackets, steps, shields)
- You can access all sides of the joint for proper welding
- The base metal is mild steel in good condition
- Machine downtime cost exceeds the repair difficulty
Call a professional if:
- The crack is on a structural member (boom, arm, frame)
- The repair involves high-strength or specialty steel (T-1, AR plate, chrome-moly)
- You need certified welds for insurance or warranty purposes
- The repair requires preheating above 400°F or post-weld heat treatment
- You’re not confident in the repair — trust your gut
Build a relationship with a mobile welder before you need one. Having a trusted welder’s number in your phone — one who knows your equipment and will prioritize your calls — is worth its weight in gold during busy season.
Welding Different Steel Types on Equipment
Heavy equipment uses several types of steel, and the welding approach varies for each.
Mild steel (A36/A572): This is what most brackets, guards, and general structures are made from. Easy to weld with any common electrode. Use E7018 for the strongest results or E6011 for dirty conditions where you can’t prep thoroughly.
AR (Abrasion Resistant) plate: Wear plates on buckets and blades are often AR400 or AR500. This is harder steel that requires more care. Preheat to 200–300°F and use E7018 low-hydrogen electrodes. Never quench AR plate — let it cool slowly or it’ll crack.
High-strength steel (T-1/A514): Some booms and structural components use high-strength quenched and tempered steel. Do not weld this without professional guidance. Incorrect welding can destroy the heat treatment and weaken the steel below its original rating.
Cast steel and cast iron: Some track components, swing gears, and older equipment use castings. Cast iron especially requires nickel-based electrodes and careful preheat/cool-down procedures. Field repairs on castings are possible but tricky.
Cost Analysis: Field Welding vs. Shop Repairs
Let’s run real numbers on a common scenario to see the financial impact.
Real-World Cost Comparison: Bucket Wear Plate Failure
Option A — Haul to shop:
- Tow/transport: $800
- Shop labor (2 hours): $300
- Downtime (full day): $1,600
- Total: $2,700
Option B — Call mobile welder:
- Service call + travel: $350
- Labor (1 hour on-site): $200
- Wait time downtime (4 hours): $800
- Total: $1,350
Option C — DIY field repair:
- Electrodes used: $15
- Grinding discs: $10
- Downtime (1 hour): $200
- Total: $225
Annual savings (assuming 6 similar repairs/season): $6,750–$14,850
Building Your Field Welding Skills
You don’t become a competent field welder overnight, but you can get functional faster than you might think.
Recommended Learning Path
-
Take a basic welding course (community college or trade school). Most offer weekend or evening programs. Focus on stick welding (SMAW). Budget 20–40 hours of instruction and practice.
-
Practice on scrap before real repairs. Get scrap steel from a metal recycler and practice the specific joints you’ll encounter — fillet welds, lap joints, and V-groove butt welds in various positions.
-
Start with low-risk repairs. Your first field repairs should be things like guards, steps, and non-critical brackets. Build confidence before tackling anything more important.
-
Learn to read your welds. A good weld has consistent width, uniform ripple pattern, no undercut, and good fusion at the toes. If your welds look like bird droppings, keep practicing.
-
Document your repairs. Take before and after photos, note the electrode used, and check the repair after 50 and 200 operating hours. This feedback loop accelerates your learning.
FieldFix can help track your repairs. Log welding repairs as maintenance events, attach photos, and set follow-up inspection reminders. Building a repair history for each machine helps you spot patterns — if the same bracket keeps cracking, the root cause might be something else entirely.
Electrode Quick Reference
| Electrode | Best For | Position | Notes |
|---|---|---|---|
| E6010 | Dirty/rusty steel, root passes | All | Deep penetration, hard to run |
| E6011 | Dirty steel (AC power) | All | AC-compatible version of 6010 |
| E7018 | Clean steel, structural repairs | All | Strongest, needs dry storage |
| E7024 | Flat/horizontal fills | Flat/Horiz | Fast deposition, easy to run |
| E312 | Dissimilar metals, unknown steel | All | Universal “mystery metal” rod |
Track Every Repair with FieldFix
Field welding repairs are maintenance events that affect your equipment’s service history and resale value. FieldFix lets you log every repair with photos, materials used, and operating hours — giving you a complete maintenance picture and helping you catch recurring issues before they become expensive problems.