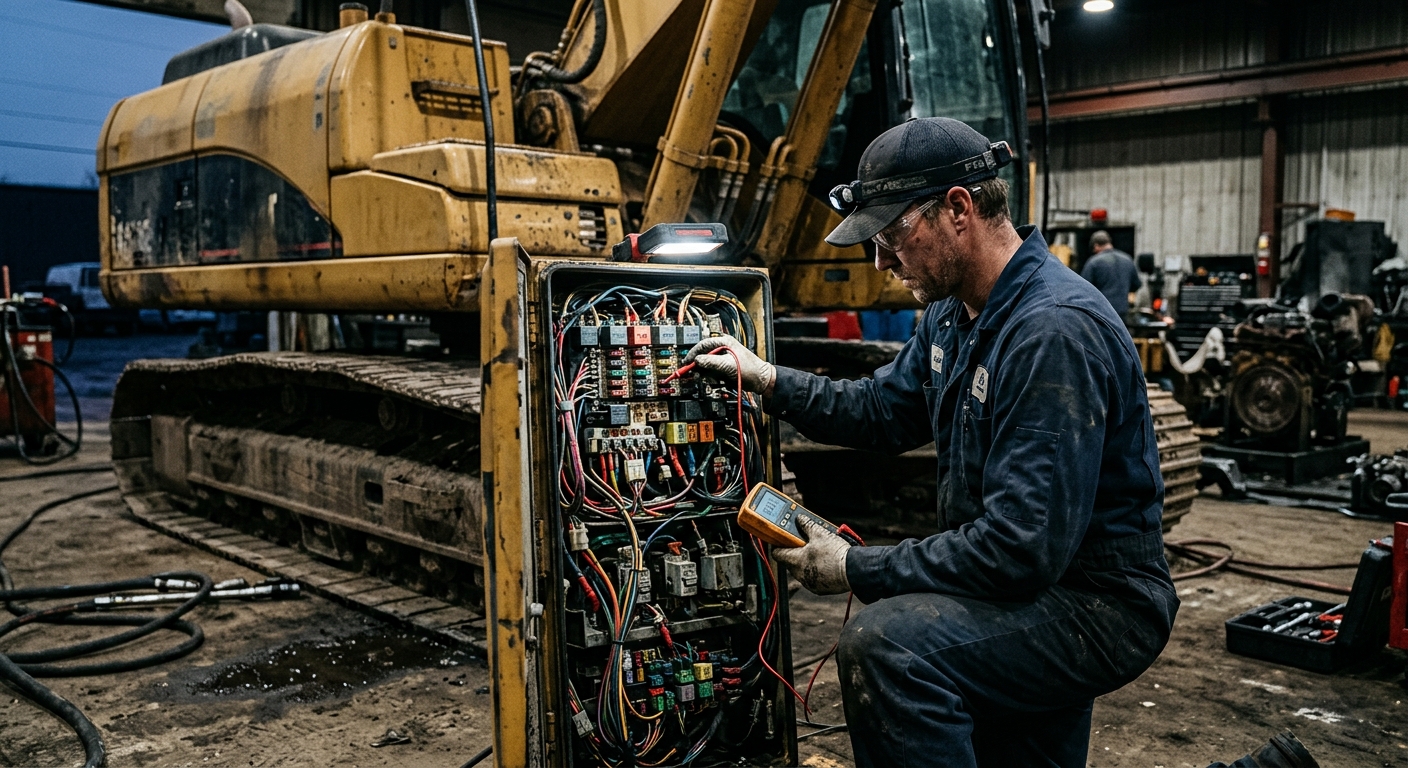
Heavy Equipment Fuse and Relay Troubleshooting Guide
Learn how to diagnose blown fuses, failing relays, and recurring electrical faults on heavy equipment before they turn into bigger downtime.
Key Takeaways
- A blown fuse is usually a symptom, not the root cause
- Replacing the same fuse twice without testing the circuit is how wiring damage gets expensive
- Heat, moisture, vibration, and bad grounds kill more relays than age alone
- A test light, multimeter, and wiring diagram solve most electrical issues faster than guesswork
- Good records help you spot repeat failures across machines before they become fleet-wide downtime
Electrical problems waste a lot of shop time because crews love to treat fuses like magic bullets. Machine does not start? Swap a fuse. Work lights flicker? Swap a fuse. HVAC fan quits? Swap a relay and hope for the best.
Sometimes that works. Usually it does not.
On heavy equipment, blown fuses and weak relays are often the first visible sign of a deeper issue: rubbed wiring, water intrusion, failing motors, corroded grounds, overheated connectors, or accessories that were installed badly. If you only replace the sacrificed part and move on, the machine comes back angry a day later.
This guide gives you a practical process for diagnosing fuse and relay problems without turning every electrical complaint into a parts cannon exercise.
Why Fuse Problems Keep Coming Back
Most fleets are comfortable with fluids, filters, and grease. Electrical work feels less tangible, so people default to replacing the part they can see. The problem is that fuses exist to protect the circuit, not to fail randomly for entertainment.
Hard Truth If a fuse blows more than once, the circuit has earned a real diagnosis. Continuing to upsize the fuse or keep feeding it replacements is a fast way to melt wiring, damage controllers, or start a machine fire.
Recurring failures usually come from one of four buckets:
- Short to ground from rubbed insulation, pinched harnesses, or contaminated connectors
- Overcurrent draw from a motor, solenoid, clutch, or actuator working harder than it should
- Bad power or ground path that creates heat, voltage drop, and unstable relay operation
- Environmental damage from water, mud, fertilizer, salt, wash-down chemicals, or rodent activity
Heavy equipment makes all four more likely because it lives in vibration, heat cycles, weather, and dirt.
What Fuses and Relays Actually Do
A fuse is the weak link by design. When current exceeds a safe level, the fuse opens and protects the wire and components downstream. It is there to die first.
A relay is a controlled switch. It uses a low-current control circuit to open or close a higher-current load circuit. That lets a small switch, sensor, or controller operate things like starter circuits, work lights, HVAC blowers, fuel pumps, or electric cooling fans without carrying all the current directly.
That matters because the symptom tells you where to start:
- Blown fuse: think short, overload, seized component, or wrong fuse value
- Clicking relay with no output: think bad contacts, low voltage, weak ground, or failed load side
- No relay click at all: think missing control signal, open coil, interlock issue, or controller logic
- Hot relay or melted socket: think resistance, loose terminals, or sustained overload
Do Not Diagnose by Sound Alone A relay clicking only proves the coil is trying to move. It does not prove the load side is carrying current cleanly. Burned contacts can click all day and still fail under load.
The Tools You Need Before Touching Anything
You do not need a lab. You do need to stop freehanding electrical work with a pocketknife and vibes.
Minimum useful kit:
- Digital multimeter with min/max and continuity
- Fused test light
- Clamp meter for current draw when applicable
- Assorted known-good relays and correctly rated fuses
- Terminal cleaning tools and dielectric-safe electrical contact cleaner
- Wiring diagram or service manual
- Back-probe pins, jumper leads, and heat shrink repair supplies
Test Light
Pros:
- Fast for checking power presence
- Great for field diagnosis
- Simple enough for operators and techs alike
Cons:
- Does not show exact voltage drop
- Can mislead you on weak circuits
- Not enough for deeper intermittent faults
Multimeter
Pros:
- Measures voltage, resistance, and continuity
- Better for finding bad grounds and voltage drop
- Critical for proving what the circuit is actually doing
Cons:
- Slower if the user does not understand the circuit
- Easy to misuse if testing resistance on a live circuit
- Needs more discipline than a basic light
If your team keeps seeing the same electrical complaints, keep main machine wiring diagrams attached to each asset record.
A Safe Troubleshooting Process That Works
The fastest way through electrical faults is a repeatable order of operations.
1. Confirm the complaint
Does the problem happen constantly, only at startup, only when hot, only in rain, or only when another function is active? Intermittent behavior is evidence. Do not throw it away.
2. Verify the correct fuse and relay
Check the manual or panel legend. Wrong amperage, wrong relay type, or swapped positions create fake problems. Plenty of shops have chased a “bad circuit” that was really the wrong fuse left by the last guy.
3. Inspect before testing
Open the panel. Look for melted plastic, green corrosion, muddy sockets, overheated terminals, aftermarket taps, loose grounds, and harness rub points near articulation joints, cabs, engine compartments, and battery boxes.
4. Replace the fuse once, then watch what triggers failure
If it blows immediately, you probably have a direct short. If it blows only when a function is commanded, focus on that load and its branch wiring. If it survives until vibration, weather, or a heat cycle shows up, suspect intermittent harness damage or connector issues.
5. Test power in and power out
For a fuse, verify battery voltage on the supply side and the protected side. For a relay, verify control voltage, ground, coil operation, and output voltage under load.
6. Isolate the load
Disconnect the motor, solenoid, clutch, or accessory on the affected circuit. If the fuse stops blowing, the load or downstream wiring is your target. If it still blows with the load unplugged, the short is upstream in the harness or socket area.
Field Example: HVAC Blower Fuse Keeps Blowing
A loader comes in with a blower motor fuse that fails every few days. The obvious move is a new blower motor. The correct move is better:
- Verify fuse size matches OEM spec
- Spin the blower by hand and inspect for drag or debris
- Measure current draw with the blower running on each speed
- Inspect the resistor pack, switch connector, and ground point
- Check cab filter condition because a plugged filter can increase blower load
Sometimes the blower motor is fine but the cab filter is packed with dust, the motor is overworking, and the connector is heat-damaged. Replace only the fuse and you learn nothing.
Common Heavy Equipment Fuse Failures
Some circuits fail more often than others because the operating environment is rough.
Lighting circuits
Work lights, strobes, and trailer plug circuits get hacked into constantly. Expect bad splices, water intrusion, over-amped accessories, and rubbed harnesses around booms, frames, and rear counterweights.
HVAC circuits
Blower motors, condenser fans, and clutch circuits pull meaningful current. Dirty filters, seized bearings, and heat-damaged connectors make these fuses frequent offenders.
Starting and enable circuits
These may not always blow fuses, but they create lots of no-start confusion. Weak batteries, poor grounds, interlocks, and low control voltage can mimic a relay or fuse problem.
Accessory and telematics circuits
Aftermarket cameras, GPS units, USB chargers, radios, and beacon kits are legendary for causing drain, noise, shorts, and ugly wiring decisions.
Aftermarket Wiring Is Always Guilty Until Proven Innocent Any accessory added after delivery deserves immediate suspicion. Scotch-lock taps, loose ring terminals, unfused leads, and mystery grounds cause a depressing amount of “random” machine downtime.
How to Test a Relay Correctly
Most standard relays are simple once you stop guessing. You are checking two separate sides:
- Coil side: usually low-current control pins
- Load side: the switched output carrying current to the component
Basic relay check:
- Confirm the relay is the right part number or terminal layout
- Check for battery voltage at the supply terminal
- Command the function and verify the coil gets voltage and ground
- Listen for a click, but do not stop there
- Measure voltage drop across the load side while energized
- Swap with a known-good identical relay only if you have already verified socket condition
If the relay clicks and the output voltage collapses under load, the contacts may be burned. If the relay does not click but power and ground are present, the coil may be open. If the relay tests fine on the bench but acts up in the machine, the socket or control signal is probably the real problem.
Bench Testing Is Helpful, Not Final A relay can pass a basic bench test and still fail when exposed to real vibration, heat, or current load. Bench results should support the diagnosis, not replace in-machine testing.
When the Problem Is Wiring, Not the Component
Wiring faults are where time disappears, but the clues are usually visible if you slow down.
Watch these zones:
- Harness bends near articulation points or tilt mechanisms
- Battery box and disconnect areas
- Under-cab and under-floor runs
- Engine bay sections near heat shielding
- Connector groups exposed to wash-down or road spray
- Relay panels mounted where dust and moisture settle
Look for shiny copper, flattened loom, soot, green corrosion, brittle insulation, or previous repairs wrapped in electrical tape and optimism.
Field Example: Repeated Light Circuit Fuse Failures
A dozer keeps popping a work-light fuse only during night grading. Daytime inspection finds nothing. Night testing reveals the harness flexes when the cab shakes on rough ground, and one rubbed spot behind a bracket touches metal only under vibration. New fuse, proper harness repair, abrasion sleeve, and clamp placement fix it permanently.
Electrical issues often follow motion, heat, or moisture. If you cannot reproduce the failure in the bay, simulate the conditions that matter.
Repair or Replace Decision Guide
Do not turn every electrical complaint into a full harness order. Do not cheap out on critical repairs either.
Repair It
Pros:
- Faster and cheaper for localized damage
- Perfect for one rubbed section, one terminal, or one bad socket
- Keeps a production machine moving quickly
Cons:
- Bad if the damage is widespread
- Easy to do poorly with weak crimps or bad sealing
- Can hide broader harness age issues
Replace It
Pros:
- Best for major corrosion, melted branches, or repeated failures
- Restores confidence in high-value circuits
- Reduces future diagnostic churn
Cons:
- Higher parts cost
- More downtime if OEM lead times are ugly
- Can be excessive if only one branch is damaged
Replace the section or assembly when:
- Multiple conductors are damaged
- The socket is heat-deformed
- Corrosion has traveled deep into the strands
- Prior repairs are stacked on top of each other
- The circuit is safety critical or controller related
Repair locally when the problem is isolated, the splice can be sealed properly, and the harness routing can be corrected so it does not fail again next month.
Building a Better Electrical PM Routine
Electrical maintenance does not need to be dramatic. It needs to be boring and consistent.
Monthly or every 250 hours, add these checks:
- Inspect fuse panels and relay boxes for moisture or dirt intrusion
- Verify battery connections and main grounds are tight and clean
- Check harness clamps and abrasion sleeves in high-movement zones
- Inspect aftermarket accessories and remove sketchy wiring
- Note any recurring blown fuses, dim lights, weak motors, or intermittent controls
Quarterly or every 500 hours:
- Load-test suspect motors and fans if complaints exist
- Open high-failure connectors for corrosion inspection
- Clean and protect critical panel areas
- Review work orders for repeat electrical issues across the fleet
Pattern Recognition Beats Heroics One loader blowing HVAC fuses is a repair. Three loaders doing it in the same season is a fleet pattern. That is where documentation starts saving real money.
Track Repeat Electrical Faults With FieldFix
Fuse and relay problems get expensive when the same machine burns three service calls before anyone realizes the issue repeats after rain, after wash-down, or after using a specific attachment.
FieldFix helps by giving every machine a maintenance history that is actually searchable. Instead of vague notes like “changed fuse,” you can log:
- Which circuit failed
- Which fuse or relay position was affected
- What operating condition triggered it
- What test results you found
- What repair was made
- Whether the failure returned
Stop Treating Electrical Faults Like Random Events
Blown fuses and failing relays are early warnings. Catch the pattern, document the fix, and stop the same downtime from hitting twice. FieldFix helps your team log failures, track repeat issues, and build a cleaner maintenance history for every machine in the fleet.
The best electrical troubleshooting is not mystical. It is disciplined. Verify the complaint, inspect the obvious, test the circuit, isolate the load, and record what happened. Do that consistently and you will spend a lot less time feeding fuses to machines that are trying to tell you something.