Heavy Equipment Wiring Harness Chafing Prevention Guide: Stop Electrical Gremlins Before They Shut Down a Machine
Learn how to inspect, route, protect, and repair heavy equipment wiring harnesses before chafing causes fault codes, shorts, downtime, and costly parts swapping.
Key Takeaways
- Wiring harness failures usually start as rubbing, vibration, bad routing, and missing clamps, not dramatic electrical disasters
- Intermittent fault codes after rain, wash-down, or rough travel often point to rubbed insulation or weak connector support
- A ten-minute harness inspection can prevent hours of parts swapping and field downtime
- Protecting high-movement and high-heat zones is cheaper than replacing sensors, controllers, or full harness sections
- Good documentation matters because repeat electrical issues are usually pattern problems, not random bad luck
Electrical failures on heavy equipment love to pretend they are something else.
The machine throws a sensor code, so someone swaps the sensor. The warning clears for a day, then comes back. Next comes the connector, then the relay, then the muttering about how modern equipment is too complicated. Meanwhile, the real problem is sitting a few inches away: a wiring harness rubbing through on a bracket, flexing too tightly near an articulation point, or hanging loose where vibration slowly eats through insulation.
That is the thing about harness damage. It often creates intermittent problems first. The machine may run fine on level ground and act possessed on a rough jobsite. It may work dry and fail after wash-down. It may pass a quick shop test and still strand you under load. Those are the worst failures because they waste time, encourage lazy guessing, and turn simple repairs into expensive hunting trips.
The good news is that harness chafing is one of the most preventable electrical problems in a fleet. You do not need magic. You need disciplined inspection, sensible routing, proper abrasion protection, and a habit of fixing the root cause instead of replacing whatever component looks guilty that day.
Info: A rubbed harness can mimic bad sensors, bad grounds, bad modules, or low-voltage issues. If a fault keeps returning after a component swap, stop blaming the component and inspect the wiring path that supports it.
Why Wiring Harness Chafing Turns Into Big Downtime
Harness failures punch above their weight because electrical systems are interconnected. A single damaged section can interrupt power, distort a sensor signal, short to ground, short to another circuit, or create a communication problem that ripples into multiple faults.
Modern heavy equipment depends on reliable signals for engine management, emissions systems, safety interlocks, joystick controls, cameras, attachment functions, and network communication between modules. That means small insulation damage can create outsized drama. You may see limp mode, loss of hydraulic function, false warnings, no-start conditions, or attachments that work only when the boom or frame happens to be in a specific position.
Chafing is especially nasty because it tends to get worse gradually. The harness rubs. The loom wears through. Then the insulation starts thinning. Then moisture, dirt, oil, and vibration join the party. By the time bare copper is visible, the machine has usually been trying to warn you for weeks.
Warning: If a machine acts up only when turning, extending, lifting, articulating, or traveling over rough ground, suspect harness movement and rub damage before you order another electronic part.
Where Harnesses Fail First on Heavy Equipment
Not every part of a harness lives the same life. Some sections sit protected in the cab. Others get cooked, twisted, sprayed, and shaken every day. The high-risk zones are predictable.
Boom and stick routing on excavators and material handlers takes constant flex. If the harness lacks proper slack control or rub protection, repeated movement wears it down. Articulation joints on loaders and dump trucks create the same problem. So do tilt and lift sections on telehandlers, aerial lifts, and compact machines with high-motion attachments.
Engine compartments are another repeat offender. Heat hardens loom, dries out tape, weakens zip ties, and makes insulation brittle over time. Add oil mist, diesel residue, and vibration, and you have an excellent environment for harness decay. Areas near exhaust components, turbo plumbing, and DPF hardware deserve extra suspicion.
Undercarriage-adjacent circuits, rear-lighting harnesses, and trailer-style pigtail sections also take a beating from mud, rock spray, impact, and pressure washing. Then there are the places people create damage during repair: near battery boxes, under floor plates, around clamp points, and anywhere a previous technician rerouted wiring in a hurry.
High-Risk Harness Zones
Usually worth extra inspection
- Articulation points and flex joints
- Boom, stick, lift, and extend sections
- Engine bay heat zones
- Battery, ground, and starter cable routing
- Attachment interface harnesses
- Lighting and rear frame exposure areas
Common reasons they fail
- Missing or broken clamps
- Sharp bracket edges
- Too much slack or not enough slack
- Heat exposure and brittle loom
- Oil contamination softening protective wrap
- Bad prior repairs with poor support
The Warning Signs Crews Should Not Ignore
Harness damage rarely announces itself with a dramatic spark show. It is more subtle and more annoying than that.
The machine may blow the same fuse twice in a month but only on rough ground. A pressure sensor code may appear only during rain. Auxiliary hydraulics may cut out when an attachment is curled all the way back. A starter circuit may act weak even after the batteries test fine. These are not “quirks.” They are clues.
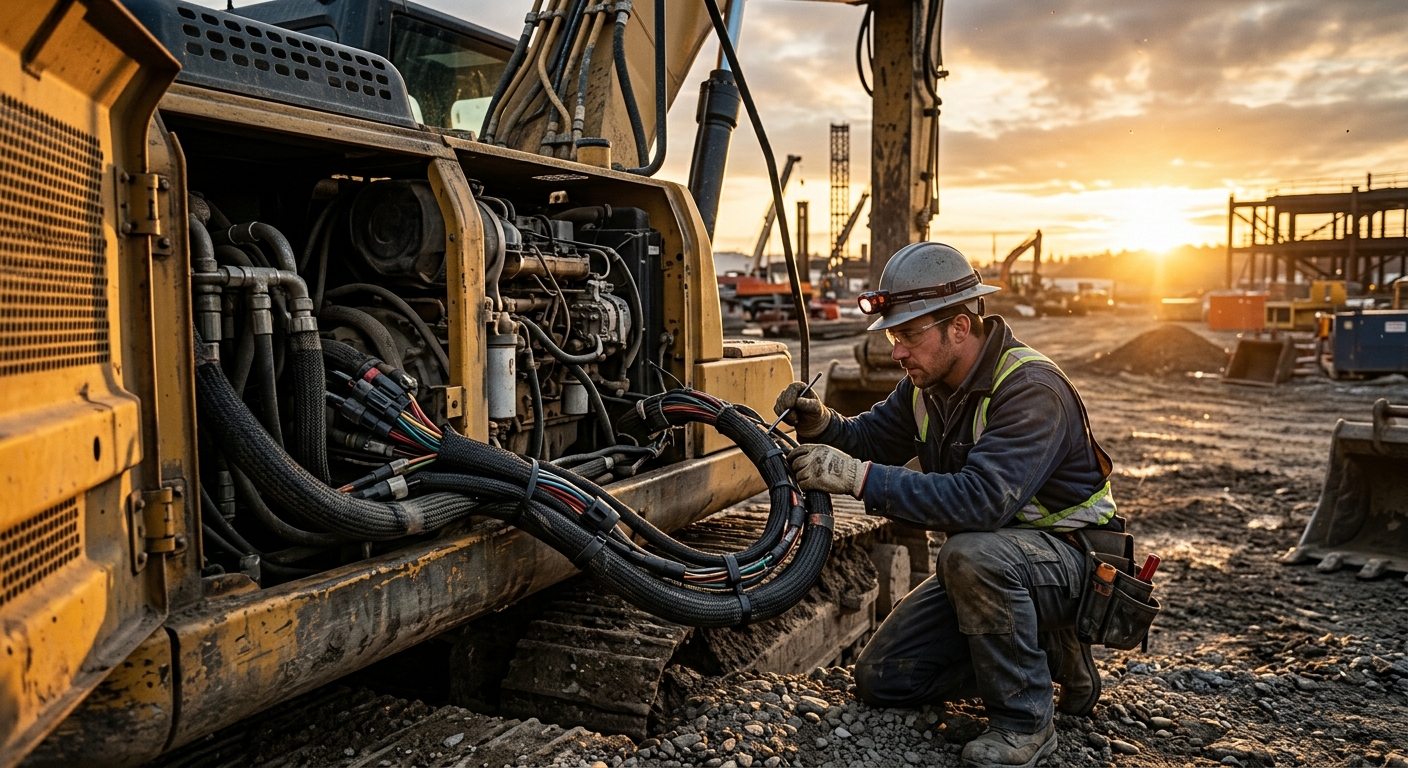
Physical evidence matters too. Look for worn loom, flattened or shiny rub spots, electrical tape fossils from old repairs, broken P-clamps, missing support clips, exposed copper, green corrosion, or harness sections hanging where they can slap a frame member. If a harness is stretched tight at full travel, it is already on borrowed time.
Danger: Do not ignore harness damage around safety circuits, travel functions, boom controls, or fire-suppression systems. Intermittent electrical faults in those areas are not just downtime problems. They are serious operating risks.
Real-World Example: The Sensor That Was Innocent
A contractor kept getting intermittent boom position faults on a telehandler. The sensor was replaced twice. The connector looked clean. The code kept coming back during cold mornings and rough travel. The actual problem was a harness segment rubbing behind a bracket where extension movement slowly wore through the insulation. Every time the boom flexed just right, the signal dropped out. The final repair involved proper rerouting, abrasion sleeve, clamp replacement, and a short harness repair. Total fix cost was minor. The wasted parts and downtime cost far more.
How to Inspect a Harness Without Making It Worse
Electrical inspection is where a lot of people either solve the problem or create three new ones.
Start with the machine safe, powered down, and supported appropriately for the area you need to inspect. If the troubleshooting process requires powered testing, do that deliberately and only after the visual inspection gives you a theory.
First, follow the harness path instead of staring only at the faulted component. The failure often lives upstream or at a support point. Look for movement marks, polish on brackets, pinched sections under clamps, unsupported spans, melted loom near heat sources, and any area where the harness crosses metal with no protective buffer.
Second, inspect travel extremes. A harness can look fine at rest and fail only when the boom is fully extended, the axle articulates, or the attachment rotates. Move the machine through safe inspection positions and watch what the harness does.
Third, document what you find before disturbing it. Photos of the original routing, rub location, and failed support hardware save time later and help prevent repeat repairs.
Pro Tip: When chasing intermittent faults, gently manipulate the harness while monitoring the circuit or live data stream. If the reading drops out, spikes, or clears when the harness moves, you are close to the real problem.
Routing and Protection Best Practices
Good harness routing is boring, and that is exactly why it works.
The goal is simple: keep the harness supported, protected, and able to move only where it is supposed to move. That means enough slack for articulation without creating loops that whip around. It means protection where the harness passes a bracket, crosses a frame edge, or lives near hoses and moving parts. It means using the right clamps, grommets, sleeves, and retainers instead of pretending zip ties are engineering.
Split loom helps, but it is not invincible. Braided abrasion sleeve, high-temp wrap, edge trim, and insulated clamps are often the better answer depending on the environment. Near heat, choose materials rated for heat. In wet abrasive zones, choose materials that survive mud and grit instead of trapping it like a sponge.
Also, respect serviceability. A perfect harness route that requires disassembling half the machine to inspect a connector is a dumb route. Good routing protects the harness and still allows normal maintenance.
Protection Choices
Good habits
- Support harnesses at sensible intervals
- Add edge protection at every metal pass-through
- Use abrasion sleeve in contact-risk zones
- Separate wiring from exhaust heat and sharp hydraulic hardware
- Replace missing clips and clamps immediately
Bad habits
- Relying on loose zip ties as permanent support
- Pulling harnesses drum-tight to make them look neat
- Routing across sharp brackets with bare loom
- Reusing brittle, oil-soaked wrap
- Leaving repaired sections unsupported
Repair vs Replace: Making the Right Call
Not every harness problem needs a full harness. Not every rubbed wire deserves a lazy tape wrap either.
If damage is isolated, conductor condition is good, and the circuit is accessible, a proper repair may be completely reasonable. That means the correct wire type, sealed splices or approved repair terminals, restored strain relief, renewed abrasion protection, and corrected routing so the problem does not come right back.
If the harness has multiple failures, widespread brittle insulation, previous ugly repairs, heavy oil contamination, or damage in a high-density branch where reliability matters, replacement is usually the smarter move. This is especially true on critical engine, emissions, or control circuits where intermittent failures can cost far more than the harness itself.
The real question is not “Can we patch this?” The real question is “Will this stay fixed in the field?”
Building a Repeatable Harness Inspection Routine
The cheapest electrical repair is the one you catch before the machine starts lying to everyone.
Build harness checks into regular PMs. Train operators to note when warnings appear, what machine movement triggered them, and whether weather or wash-down was involved. During weekly or monthly inspections on high-use machines, walk the high-risk harness zones on purpose instead of waiting for a code to force the issue.
Create a simple routine:
- Check support clips, P-clamps, and edge protection.
- Inspect high-motion routing at full safe travel.
- Look for heat damage, rub marks, crushed loom, and sloppy prior repairs.
- Photograph any suspicious wear.
- Log the machine, location, hours, and symptom before it becomes a bigger failure.
How FieldFix Helps Track Electrical Patterns
Electrical problems become manageable when the evidence lives in one place.
If one machine keeps throwing the same intermittent code after wash-down, that is a pattern. If three technicians have already noted rubbed loom near the same articulation point, that matters. If a prior repair held for 200 hours and then failed again, that tells you the routing was still wrong.
FieldFix helps fleets track those details with machine histories, photo documentation, repeat issue logging, and service records that connect symptoms to actual root causes. Instead of treating every electrical failure like a fresh mystery, your team can see where the harness was damaged before, what repair was made, and whether the support or routing change actually solved it.
That is how you get out of the cycle of replacing innocent parts and start fixing the machine once.
Stop Chasing Ghost Faults
Harness issues are not glamorous, but they cause a ridiculous amount of downtime when nobody tracks them properly. FieldFix gives your team one place to log electrical symptoms, attach photos, document repairs, and spot repeat failures before they become shutdowns.