Track Tension Adjustment Guide: How to Set and Maintain Proper Tension on Excavators, CTLs & Dozers
Learn how to check and adjust track tension on heavy equipment. Proper tension prevents premature wear, improves performance, and saves thousands in repairs.
Key Takeaways
- Track tension accounts for 50% of undercarriage wear — improper tension accelerates component failure
- Check tension every 8-10 hours for optimal performance and longevity
- Terrain matters — loosen tracks 1-2 inches for mud/sand, tighten for hard surfaces
- The “sag test” is your friend — measure deflection at the midpoint between rollers
- Over-tight tracks cause more damage than loose ones — when in doubt, err slightly loose
Running tracked equipment without proper track tension is like driving a car with the wrong tire pressure—except the consequences are measured in thousands of dollars instead of a few MPG. Yet on job sites across the country, operators fire up machines every morning without checking this critical adjustment.
Track tension is arguably the single most important daily maintenance task on any tracked machine. Get it right, and your undercarriage components last their full service life. Get it wrong, and you’re looking at premature wear, decreased performance, and repair bills that can exceed $20,000.
Why Track Tension Matters More Than You Think
The undercarriage represents 50% of your tracked machine’s maintenance costs over its lifetime. Within that undercarriage, track tension is the primary factor determining how long every component lasts—from the idlers to the sprockets to the tracks themselves.
When tracks are too tight, every rotation creates excessive friction. The sprocket teeth wear faster. The idler bearings run hot. The track links stretch under constant strain. The entire system is fighting against itself.
When tracks are too loose, different problems emerge. The track “walks” off the sprocket, causing misalignment. Impact loads increase as the track slaps against the frame. Debris packs into gaps, accelerating abrasion. De-tracking becomes a constant risk.
Either extreme leads to the same result: you’re replacing components before their time.
The Real Cost of Improper Track Tension
Let’s put real numbers to this problem. Consider a typical compact track loader (CTL) with rubber tracks:
Case Study: CTL Track Wear Analysis
Machine: 2023 Compact Track Loader, 74 HP
Expected track life: 1,500 hours
Actual track life: 900 hours (40% reduction)
Root cause: Consistently over-tensioned tracks
Financial Impact:
- New rubber track set: $4,200
- Lost productivity during replacement: $800
- Premature cost: $5,000 every 600 hours instead of never
- Annual cost of improper tension: $3,333+ (assuming 400 hrs/year)
The operator thought tight tracks meant “secure” tracks. In reality, they were burning through rubber at nearly double the expected rate.
Now consider a larger excavator with steel tracks:
Case Study: Excavator Undercarriage Failure
Machine: 30-ton Excavator, 4,200 hours
Problem: Severe sprocket wear, track link stretching
Root cause: Tracks run too loose in mudite conditions
Repair Costs:
- Two sprocket segments: $3,800
- Track link replacement (partial): $8,400
- Labor (40 hours): $4,800
- Total: $17,000
Expected vs. Actual:
- Sprockets should last 6,000+ hours
- Tracks should last 5,000+ hours
- Both failed at under 4,500 hours
Running loose tracks in packed mud allowed debris accumulation that acted like grinding compound on every component.
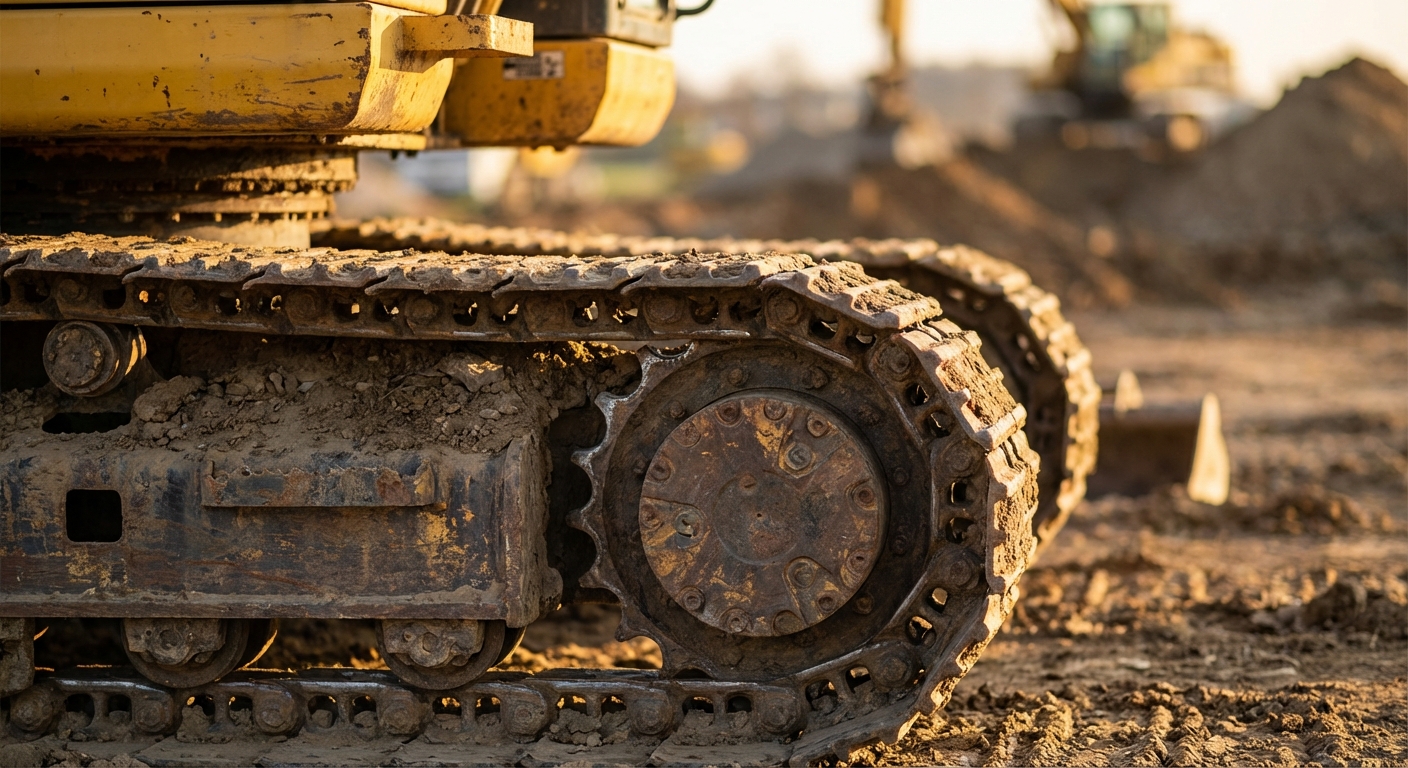
How Track Systems Work
Understanding the track system helps explain why tension is so critical.
Steel Track Systems (Excavators, Dozers)
Steel track systems use a chain-like design with individual links connected by pins and bushings. Key components include:
- Track links — The “chain” that wraps around the undercarriage
- Track shoes — Bolt-on plates (grouser bars) that provide ground contact
- Sprocket — Driven gear that moves the track
- Front idler — Guides the track and provides tensioning
- Track rollers — Support the machine’s weight along the track frame
- Carrier rollers — Guide the returning (top) section of track
- Track adjuster — Hydraulic or grease-filled cylinder that tensions the track
The tensioning system works by pushing the front idler forward, taking up slack in the track. Most modern machines use a hydraulic or grease-cylinder system that allows adjustment without tools—just a grease gun or relief valve.
Rubber Track Systems (CTLs, Mini Excavators)
Rubber tracks are continuous belts reinforced with steel cables or cords. The tensioning principle is similar, but the track behaves differently:
- Rubber is elastic — It stretches when warm and contracts when cold
- No individual links — Tension is distributed across the entire belt
- Steel cords inside — Provide tensile strength but can break if over-tensioned
- Rubber lugs — Replace steel grousers for ground engagement
The Sag Test: Checking Track Tension
The “sag test” is the industry-standard method for checking track tension. It measures how much the track deflects (sags) between support points when the machine is on level ground.
How to Perform the Sag Test
Step 1: Position the machine
- Park on firm, level ground
- Lower all attachments to the ground
- Shut down the engine
Step 2: Clean the track area
- Remove any mud, debris, or packed material from the track
- This is critical—packed debris gives false tension readings
Step 3: Identify measurement points
- Locate the front idler and first track roller
- For excavators: measure between the front idler and first bottom roller
- For CTLs/dozers: often measure at the midpoint of the upper track span
Step 4: Place a straightedge
- Lay a straight board, level, or string line across the top of the track
- The straightedge should span the grouser tips (highest points)
Step 5: Measure the sag
- Using a tape measure or ruler, measure the gap between the straightedge and the lowest point of the track sag
- This is your “sag measurement” or “deflection”
Step 6: Compare to specifications
- Check your operator’s manual for the correct sag range
- Typical ranges vary by machine type and manufacturer
Tension Specifications by Equipment Type
Every manufacturer has specific tension requirements. These are general guidelines—always defer to your operator’s manual.
Excavators (Steel Tracks)
| Class | Weight | Typical Sag | Notes |
|---|---|---|---|
| Mini | Under 6 tons | 0.75-1.25” | Check at carrier roller |
| Small | 6-13 tons | 1-1.5” | Measure between idler and first roller |
| Medium | 13-30 tons | 1.25-2” | Some models have wear indicators |
| Large | 30+ tons | 1.5-2.5” | May require lifting one track |
Compact Track Loaders (Rubber Tracks)
Rubber track tension is generally tighter than steel to prevent de-tracking under high loads and tight turns.
| Brand | Model Range | Typical Sag | Special Notes |
|---|---|---|---|
| Generic CTL | All | 0.5-1” | Measure when warm |
| High-flow models | 90+ HP | 0.5-0.75” | Higher torque = tighter spec |
Dozers (Steel Tracks)
Dozers typically run slightly looser than excavators because they encounter more impact loading from pushing material.
| Size Class | Typical Sag | Operating Notes |
|---|---|---|
| Small (under 100 HP) | 1-1.5” | Check after first hour of operation |
| Medium (100-200 HP) | 1.5-2” | May vary by track shoe width |
| Large (200+ HP) | 2-2.5” | Consult dealer for exact specs |
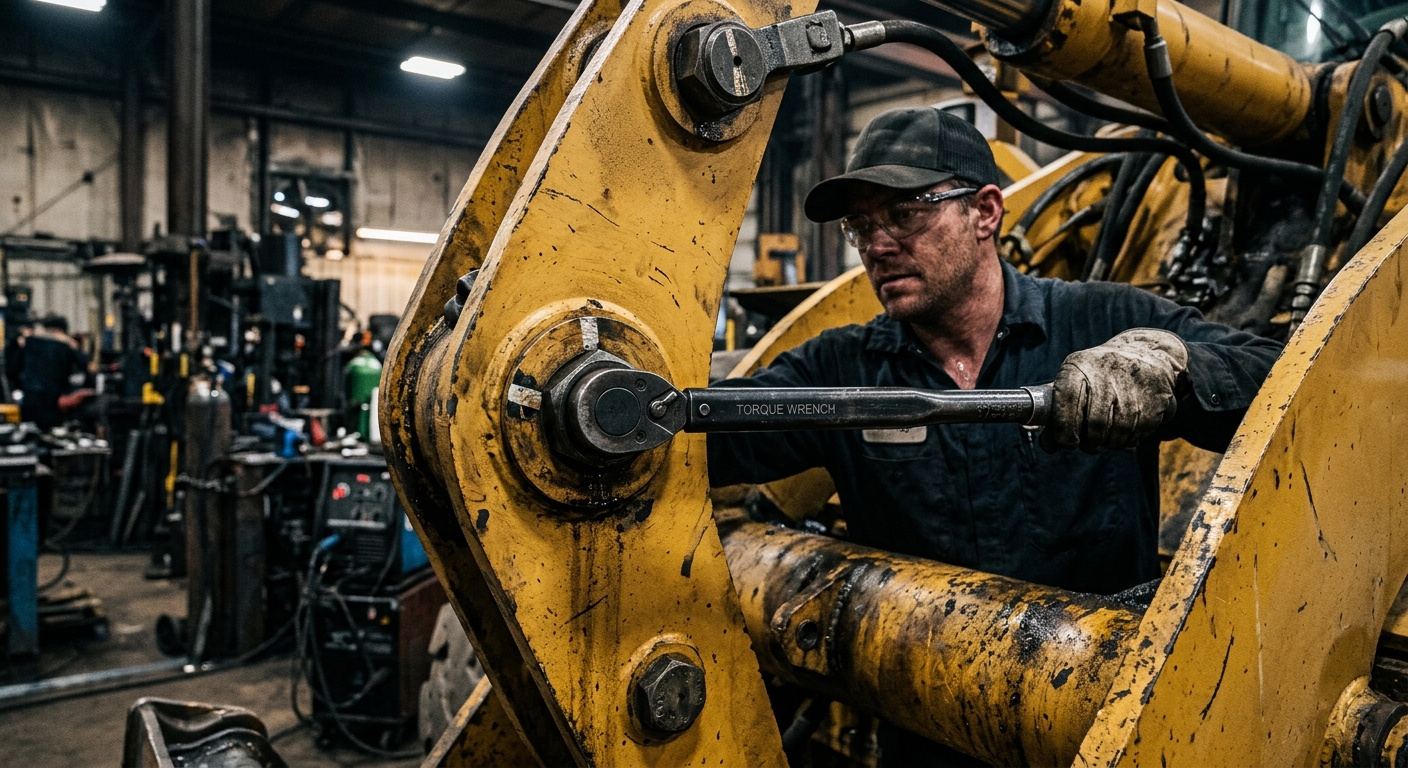
Step-by-Step Adjustment Procedure
Tightening Tracks (Increasing Tension)
For grease-cylinder systems (most common):
- Locate the track adjuster valve—usually a grease fitting on the track frame near the front idler
- Remove the protective cover or plug
- Using a grease gun, pump grease into the fitting
- Watch the track—you’ll see the idler move forward as tension increases
- Re-check sag after every 3-5 pumps
- Stop when within specification
- Replace the protective cover
For hydraulic systems:
- Locate the tensioning cylinder access panel
- Connect a hydraulic hand pump to the service port
- Slowly pump until the idler moves forward
- Check sag frequently
- Some systems have a pressure gauge—stop at the specified pressure
Loosening Tracks (Decreasing Tension)
Loosening requires releasing pressure from the adjuster—this can be hazardous if done incorrectly.
For grease-cylinder systems:
- Park on level ground, lower attachments, shut down
- Locate the relief valve on the track adjuster (often a small hex plug)
- Stand clear of the track—released tension can cause sudden movement
- Slowly loosen the relief valve (1/4 turn at a time)
- Grease will begin to escape, releasing pressure
- Check sag after each 1/4 turn
- Once at specification, tighten the relief valve
- Clean any expelled grease
Terrain-Based Tension Adjustments
One of the most overlooked aspects of track tension is adjusting for ground conditions. Running the same tension in mud as you do on hardpan is asking for trouble.
Soft Ground (Mud, Sand, Snow)
Adjustment: Loosen tracks 1-2” beyond normal specification
Why: Soft material packs between the track components. If tracks are tight and mud packs in, the effective circumference increases, creating extreme tension that can break tracks or damage components.
Real-World Example
An excavator operator in Louisiana ran standard tension while digging drainage ditches in clay soil. After 4 hours, the track was so packed with clay that it effectively became 3” “longer”—creating massive tension on a system set for normal conditions.
Result: Bent track adjuster rod, damaged idler bearing. $2,400 repair.
Prevention: Running 2” of extra sag would have allowed the clay to pack and shed without creating dangerous tension.
Hard Ground (Concrete, Asphalt, Rock)
Adjustment: Run at or slightly below normal specification
Why: No packing occurs, and tighter tracks provide better control on smooth surfaces. However, don’t over-tighten—the added friction accelerates wear.
Mixed Conditions
When moving between soft and hard surfaces frequently, err toward the looser setting. It’s better to have slightly loose tracks on hardpan than over-tight tracks in mud.
Steel vs. Rubber Tracks: Different Rules
Steel Tracks
Advantages for tension management:
- More tolerant of slight under-tension
- Don’t stretch permanently (links can be removed)
- Less affected by temperature changes
- Visual wear indicators on many models
Challenges:
- Require more frequent cleaning of packed material
- Higher consequence of de-tracking (heavy)
- More complex adjustment systems on some machines
Rubber Tracks
Advantages for tension management:
- Self-cleaning grooves shed material
- Lighter weight = easier to re-track if de-tracked
- Some systems auto-tension
Challenges:
- Permanent stretch over time = must replace eventually
- Temperature sensitive (check when warm)
- Over-tension breaks internal steel cords (invisible damage)
- Under-tension causes edge wear and chunking
Common Mistakes and How to Avoid Them
Mistake #1: “Tighter is Better”
Reality: Over-tight tracks cause more damage than loose ones. They accelerate component wear, consume more fuel, and put constant stress on seals and bearings.
Fix: Always measure, never guess. If in doubt, run at the looser end of the specification range.
Mistake #2: Adjusting with Packed Tracks
Reality: Checking tension when the track is full of mud gives a false “tight” reading. Once the mud falls out, the track is actually loose.
Fix: Clean tracks before checking tension. Run the machine forward and backward to shed material.
Mistake #3: Never Adjusting for Conditions
Reality: Running the same tension in clay, sand, and rock guarantees you’re wrong most of the time.
Fix: Adjust tension at the start of each job based on soil conditions. It takes 2 minutes.
Mistake #4: Ignoring Uneven Wear
Reality: If one side wears faster than the other, tracking (alignment) is off. Tension adjustments won’t fix this.
Fix: Have the undercarriage alignment checked. Bent frames, worn idlers, or improper track shoe installation can cause uneven wear.
Mistake #5: Waiting Until Something Breaks
Reality: By the time you hear grinding, feel vibration, or see visible damage, the problem has already cost you money.
Fix: Build track tension checks into every pre-operation inspection. It takes 2 minutes and catches problems before they escalate.
Troubleshooting Track Problems
| Symptom | Likely Cause | Solution |
|---|---|---|
| Track de-rails frequently | Too loose, worn components, debris | Check tension, inspect idler and rollers |
| Excessive track noise | Too tight, dry bushings, worn sprocket | Loosen to spec, check lubrication |
| Uneven shoe wear | Misalignment, bent frame | Professional alignment check |
| Track “walks” to one side | Uneven tension, worn idler | Adjust both sides, inspect idler |
| Sprocket climbing | Stretched track, worn sprocket | Measure chain pitch, inspect teeth |
| Premature idler failure | Over-tension, contamination | Run at spec, clean more often |
Maintenance Schedule and Documentation
Recommended Check Intervals
| Interval | Action |
|---|---|
| Every 8-10 hours | Visual check, sag test if conditions changed |
| Every 50 hours | Full sag test, documented measurement |
| Every 250 hours | Inspect track adjuster, clean and grease |
| Every 500 hours | Comprehensive undercarriage inspection |
What to Document
Track tension is one of the easiest maintenance items to track, yet one of the most commonly ignored. Document every adjustment:
- Date and hour meter reading
- Measured sag (both sides for dual-track machines)
- Adjustment made (tightened/loosened, how much)
- Ground conditions at the time
- Any anomalies observed
This data becomes invaluable when planning undercarriage replacement or diagnosing premature wear.
Conclusion
Track tension isn’t glamorous maintenance. There’s no satisfying wrench turn, no visible improvement after you do it. But the absence of problems—the tracks that last their full life, the sprockets that don’t wear prematurely, the idler bearings that don’t seize—that’s the reward.
Two minutes of checking. A few pumps of the grease gun when needed. That’s all it takes to protect a $15,000-$30,000 undercarriage investment.
Make it part of your daily walk-around. Your tracks—and your wallet—will thank you.
Track Every Maintenance Task with FieldFix
Stop letting track tension checks fall through the cracks. FieldFix helps you:
- Log maintenance with photos and notes
- Set reminders for interval-based checks
- Track costs to see real cost-per-hour data
- Use AI diagnostics when problems arise
Free for up to 3 machines. No credit card required.
Related Articles
April 29, 2026
Heavy Equipment Fastener Torque Inspection: Stop Small Bolts From Becoming Big Failures

April 28, 2026
Heavy Equipment Glass, Mirror, and Wiper Maintenance Guide

April 27, 2026