Heavy Equipment Delivery Acceptance Inspection Guide: What to Check Before You Put a Machine to Work
Learn how to inspect heavy equipment at delivery so you catch shipping damage, missing parts, fluid leaks, and paperwork issues before downtime starts.
Key takeaways:
- Delivery day is your best chance to catch damage, missing parts, and paperwork mistakes before they become your problem
- A machine can arrive looking clean and still have leaks, loose hardware, transport damage, or inactive safety systems
- Acceptance inspections should be different from daily pre-op checks because you are verifying condition, configuration, and responsibility
- Photos, meter readings, and signed notes protect your company during warranty, rental, and transport disputes
- A 20-minute arrival process can prevent days of downtime, surprise repair bills, and ugly finger-pointing later
The moment a machine lands in your yard or rolls onto a jobsite, the clock starts. Crews want to run it. Sales wants it billed. Operations wants the schedule moving. That urgency is exactly why delivery-day problems get missed.
A machine can show up washed, fueled, and ready to impress while still carrying transport damage, low fluid levels, dead batteries, loose attachments, missing guards, bad paperwork, or a fault history nobody mentioned. If you skip the acceptance inspection, you inherit all of that risk fast.
That is why smart fleets treat delivery acceptance as its own process. It is not the same as a normal pre-op. A pre-op asks, “Can we run this safely today?” An acceptance inspection asks, “Did we receive exactly what we agreed to receive, in the condition we were promised, with no hidden problems about to become ours?”
Why delivery acceptance matters
Delivery acceptance is where maintenance, operations, and liability all meet in one place.
If you buy used equipment, receive dealer service returns, rent machines during peak season, or move assets between branches, you already know the pain. The problem is rarely one catastrophic defect. It is the accumulation of small misses:
- a cracked light housing that was not there before transport
- a slow hydraulic seep that turns into a real leak on day two
- a bucket, coupler pin, manual, or key that never arrived
- hour meter readings that do not match the contract
- a machine mode, attachment calibration, or telematics setting left wrong for your operation
Info: The goal is not to delay every delivery with a two-hour ritual. The goal is to create a fast, repeatable gate that catches expensive surprises before your team commits the machine to work.
When to use this process
Use a formal delivery acceptance inspection any time responsibility is changing hands or expectations need to be proven. That includes:
- new machine deliveries from a dealer
- used equipment purchases
- rental deliveries and pickups
- equipment returning from a major repair
- equipment transferred between branches, crews, or yards
- auction purchases arriving from transport
This process matters even more when the machine is headed straight to production. If a dozer is arriving Monday morning for a time-sensitive site package, that is not the day to “just glance at it and hope.”
- High-value machines
- Rented equipment with strict damage terms
- Used purchases with limited warranty
- Machines returning from major hydraulic or engine work
- Anything delivered directly to an active jobsite
- Damage claims get harder to prove
- Missing accessories are found too late
- Warranty disputes start with weak documentation
- Operators inherit unsafe or misconfigured machines
- Downtime starts on your first production day
What to inspect before unloading
The inspection starts before the machine touches the ground. That matters because some damage is easier to attribute while the machine is still secured on the trailer.
Walk the load before unloading and look for:
- shifted tie-downs or signs the machine moved in transit
- obvious sheet metal, railing, or counterweight damage
- broken glass, mirrors, lights, antennas, or cameras
- leaking fluids on the deck, ramps, or trailer floor
- loose accessories, buckets, forks, or attachment hardware
- tracks or tires that look flat, cut, or damaged
Take wide photos from all four corners and close-ups of anything questionable. If the driver is waiting, good. That is exactly when you want proof collected.
Warning: Do not let “we are in a hurry” override documentation. Once the machine is unloaded, moved, or fueled, it becomes much easier for the seller, rental yard, or hauler to argue the problem happened on your side.
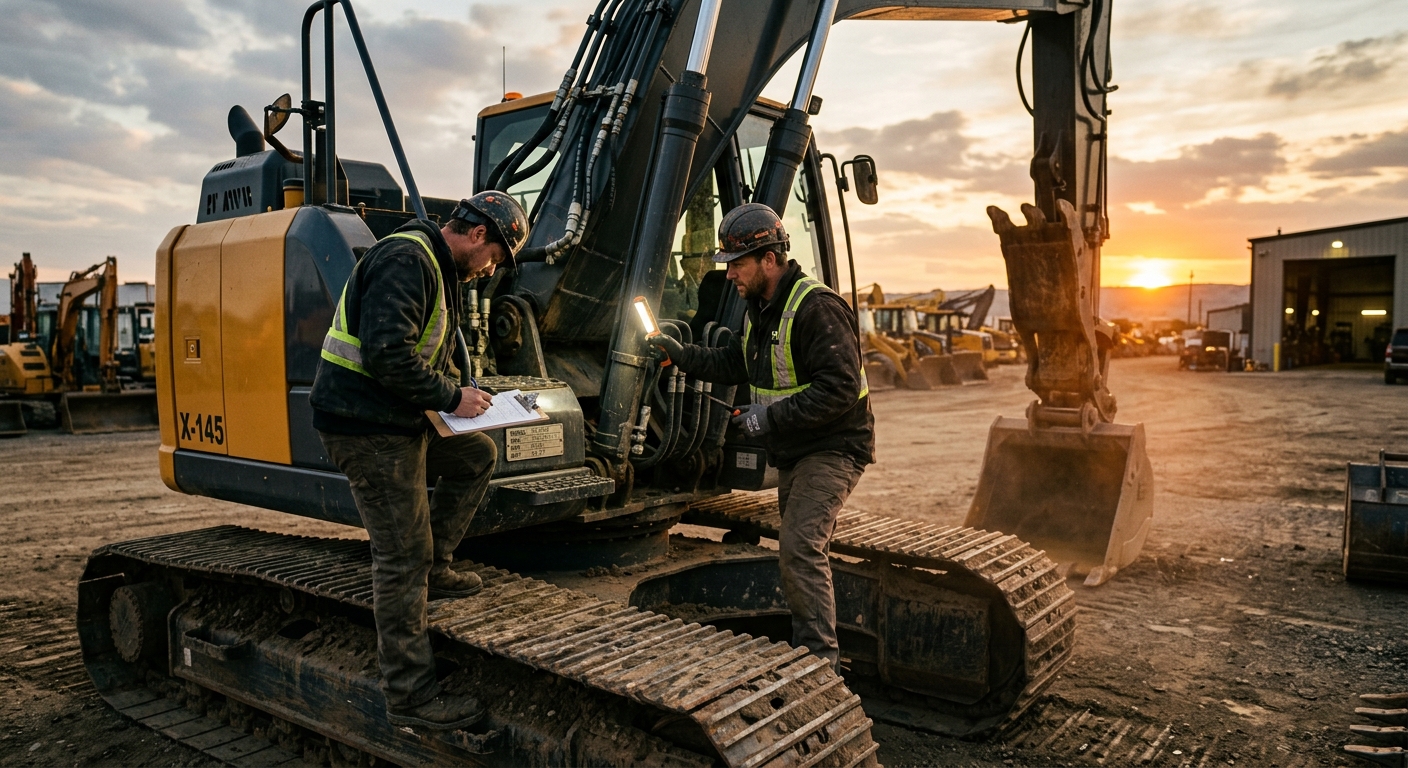
The full acceptance checklist
Once the machine is safely unloaded, run a structured inspection. Keep it practical. You are not trying to rebuild the machine in the parking lot. You are verifying condition, completeness, and readiness.
1. Verify identity and paperwork
Confirm the serial number, make, model, attachment list, and meter reading against the purchase order, rental agreement, service ticket, or transfer record. If the numbers do not match, stop right there and resolve it.
Check that you received:
- keys or start codes
- operator manuals if promised
- emissions or inspection paperwork if applicable
- warranty or repair documentation
- attachment inventory and accessory list
2. Check overall machine condition
Walk around slowly. Look for dents, cracks, bent guards, missing panels, damaged steps, loose handrails, and signs of rough handling. Cosmetic damage is not always “just cosmetic.” It often points to where the real impact happened.
Pay attention to:
- engine doors and latches
- handholds and access ladders
- lights, lenses, mirrors, cameras, and alarms
- hoses or harnesses hanging lower than they should
- loose belly pans or missing fasteners
3. Inspect fluids and leak points
Check engine oil, coolant, hydraulic oil, DEF if equipped, fuel, and visible axle or final drive areas where relevant. You are not only checking level. You are checking for clues.
Look for:
- fresh wetness around fittings and hose crimps
- residue under pumps, cylinders, or valve blocks
- milky, contaminated, or burnt-looking fluid
- overflow evidence around coolant or hydraulic tanks
- stains under the parked machine after a few minutes
4. Confirm attachment and configuration correctness
Make sure the machine arrived with the correct bucket, forks, coupler, hammer lines, guards, counterweights, tires, pads, or auxiliary setup that was promised.
This sounds basic, but it is a common failure point. A machine can be mechanically fine and still wrong for the job because it arrived with:
- the wrong bucket width
- missing coupler pins
- incorrect hydraulic settings
- no attachment control pattern configured
- worn cutting edges or attachment teeth that were not disclosed
5. Test startup, safety systems, and controls
Start the machine and do not rush the first five minutes. Watch the panel. Listen to the engine. Cycle the controls deliberately.
Verify:
- startup behavior and cranking speed
- warning lights and fault messages
- horn, backup alarm, work lights, and cameras
- parking brake and interlock function
- basic travel, steering, lift, curl, boom, or swing functions
- HVAC, wipers, seat belt, and operator display
Tip: If the machine has telematics, verify it is actually reporting to the right account and asset profile. A machine you cannot see, track, or service correctly in software is already starting behind.
6. Do a short function test under light load
If conditions allow, operate the machine briefly. You are looking for drift, hesitation, unusual vibration, slow response, overheating tendencies, or noises that only show up in motion.
This is where plenty of “looks fine” machines get exposed. A quick travel test might reveal brake pull. A light hydraulic cycle might show chatter. A short warm-up might expose a coolant smell or charging issue.
7. Capture proof and sign off correctly
Finish with documentation:
- photos of all sides
- close-ups of issues
- meter reading photo
- serial number photo
- written notes on damage, missing items, or conditions accepted with exception
- name of the person who received the machine
- name of the driver, dealer rep, rental rep, or seller if available
Do not rely on memory. Delivery-day memory is terrible because everyone is trying to move on to the next thing.
Example: The “minor” leak that was not minor
A contractor receives a mid-size excavator from a rental yard. The machine looks clean, starts fine, and the crew wants to send it straight to a drainage job. During the acceptance check, the foreman notices a light film of oil at a boom cylinder hose fitting and takes photos before operating. By lunch, the seep has turned into a visible leak. Because the issue was documented at arrival, the rental yard owns the repair and the hose replacement cost. Without those photos, that bill probably lands on the contractor.
Common red flags you should not ignore
Some issues deserve extra caution because they tend to become arguments, breakdowns, or safety problems fast.
- fresh paint or cleanup in one isolated area
- active fault codes, even if the seller says they are “old”
- fluid residue that looks recently wiped down
- mismatched tires or tracks on the same machine
- cracked glass or missing mirrors on a roadable unit
- missing guards, covers, or safety decals
- unusually hot smells, electrical smells, or coolant odor after a short run
- attachments with severe wear compared to the machine description
Danger: Never accept “that has always done that” as a serious technical explanation. If something leaks, binds, alarms, or shows a fault at delivery, document it as a current issue and decide whether the machine should be accepted at all.
Repair now, reject, or document and proceed
Not every problem should stop the deal, and not every problem should be waved through.
Use three buckets:
Accept and proceed
Use this when the machine is correct, safe, functional, and any defects are genuinely minor. Think light cosmetic scuffs, normal wear disclosed in advance, or missing non-critical paperwork that can be sent immediately.
Accept with exceptions
Use this when the machine can work, but issues are documented and responsibility is assigned in writing. Examples include a light lens that needs replacement, a promised accessory arriving tomorrow, or a minor leak scheduled for dealer service.
Reject or park until resolved
Use this when the issue affects safety, function, legal compliance, or the core terms of the deal. Wrong serial number. Active hydraulic leak. Unsafe brakes. Missing counterweight. Incorrect attachment package. Faults the seller cannot explain cleanly. That is not nitpicking. That is protecting your schedule and your wallet.
Example: Wrong machine, right paperwork
A fleet takes delivery of a compact loader ordered with high-flow hydraulics for a specialty attachment. The unit on the trailer is the same model family, same color, and comes with matching paperwork, but the serial number and hydraulic package are wrong. Because the receiver verifies configuration before sign-off, the machine never makes it onto the schedule. That one five-minute check prevents a jobsite scramble later when the attachment will not run correctly.
How to standardize the process across your fleet
The best delivery acceptance program is boring in a good way. Same checklist. Same photos. Same sign-off path. Same place to store records.
In practice, that means:
- Create one checklist for purchases, rentals, and internal transfers.
- Train foremen, shop leads, and yard staff on what must be documented every time.
- Require photos for all arrivals, not just problem deliveries.
- Log exceptions immediately so operations, maintenance, and accounting see the same facts.
- Store everything under the asset record so disputes and repeat issues are easy to trace.
FieldFix is useful here because delivery acceptance should not live in random texts and camera rolls. If the machine arrives with damage, a missing attachment, or an unresolved leak, that note should sit next to the asset history from day one.
When you standardize the process, two good things happen. First, people miss fewer issues. Second, your team gets faster because nobody has to reinvent the inspection from memory every time a truck shows up.
Bottom line
Delivery acceptance is one of the highest-leverage inspections in fleet operations. It is fast, cheap, and massively underrated. You get one clean shot to prove what arrived, what condition it was in, and who owns the next step.
Do that well, and you catch problems before they become downtime, arguments, or surprise invoices. Skip it, and the machine’s first failure becomes your detective story.
Use FieldFix to log delivery inspections, attach photos, record meter readings, assign corrective actions, and keep every asset's acceptance history in one place.