Heavy Equipment Jacking and Blocking Safety Guide for Maintenance Crews
Learn how to jack, crib, block, and support heavy equipment safely during maintenance to prevent crush injuries, frame damage, and avoidable downtime.
Key Takeaways
- Hydraulics are not a support device. If a machine is raised for service, it needs mechanical support that matches the load.
- Ground conditions matter as much as the jack. Soft gravel, hot asphalt, and uneven shop floors turn safe-looking lifts into ugly failures.
- Cribbing and blocking only work when stacked correctly. Clean, flat, square contact beats improvised nonsense every time.
- Most lifting incidents start before the machine leaves the ground because teams skip the plan, the load estimate, or the escape path.
- Good documentation prevents repeat mistakes by tying lifting setups, near misses, and support equipment inspections back to the fleet record.
Jack a machine wrong and the repair bill is the least of your problems.
This is one of those jobs that gets treated like routine until a bottle jack spits sideways, a stand sinks, a crib stack kicks out, or someone crawls under iron that is being held up by hope and hydraulic pressure. Every maintenance crew says they know better. Plenty of them still cut corners when the weather sucks, the ground is uneven, or the job “will only take a minute.”
That minute is where people get crushed.
This guide covers how to raise and support heavy equipment safely for tire service, undercarriage work, brake inspection, hose repair, attachment service, and other maintenance tasks where part of the machine has to leave the ground.
Why jacking and blocking goes wrong so often
Most lifting incidents are not caused by exotic failures. They come from ordinary shortcuts:
- using the wrong jack because it was closest
- lifting from a bad point on the frame, axle, or attachment
- trusting outriggers, cylinders, or booms without secondary support
- stacking cribbing like a game of drunk Jenga
- working on dirt or stone that cannot carry the load consistently
- lifting first and figuring it out afterward
Crews see a task that feels small, so the support plan gets small too. But the machine weight has not changed just because the repair looks simple.
Can twist a jack saddle, damage a housing, or shift the whole load unexpectedly.
Lift with one device, hold with another. A jack should raise; blocking or stands should support.
Sink, slip, or shift. Most ugly incidents fit one of those buckets.
If the setup is sketchy enough to make someone say "be careful," it is already wrong.
Warning: Never rely on hydraulic cylinders, stabilizers, loader arms, dump bodies, or booms as the only support during maintenance. Hydraulics leak down. Pins fail. Valves move. Gravity stays undefeated.
The loads you are actually trying to control
People talk about lifting capacity like the only question is whether the jack is big enough. That is lazy thinking.
You need to think about:
- Static weight of the part of the machine being raised
- Weight transfer as the center of gravity shifts during the lift
- Stored energy in suspension, tires, tracks, cylinders, or attachments
- Surface behavior under load
- Side loading if the machine is not perfectly square to the support point
Lifting one corner of a wheel loader does not just mean handling one quarter of the machine weight. Bucket position, articulation angle, attachment weight, tire inflation, and ground slope all change how that load behaves.
That is why service manuals specify lift points and support procedures. They are not suggestions for people who love paperwork. They are how you avoid turning housings, belly pans, or axle components into accidental load-bearing experiments.
Simple rule: If you do not know the approved lift points, stop and look them up before the machine leaves the ground.
Choosing the right jack stands cribbing and blocking
The right support gear depends on the machine, the job, and the surface.
Jacks
Hydraulic bottle jacks, service jacks, air-over-hydraulic jacks, and toe jacks all have their place. Use them for controlled lifting, not long-term support. The higher the lift, the less forgiving small alignment problems become.
Jack stands
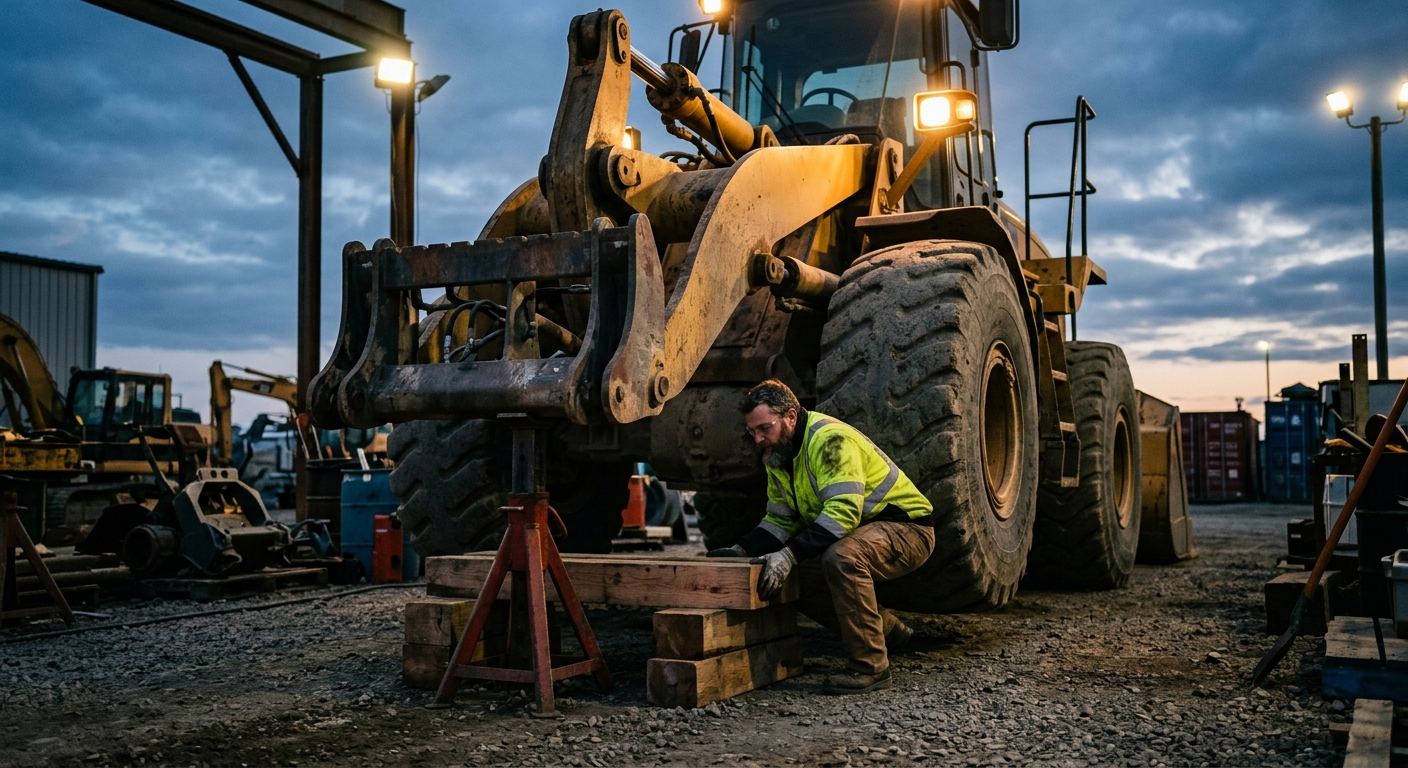
Good stands provide mechanical support after the lift. They need:
- rated capacity above the supported load
- stable feet appropriate for the ground or floor
- intact locking pins or pawls
- enough height range to support the machine without overextending the jack
Cribbing and blocking
Cribbing spreads load and creates stable height in places where a stand does not fit or the ground needs a larger footprint. Hardwood blocking, purpose-built composite cribbing, and heavy steel support fixtures can all work when used correctly.
Well-Planned Support Setup
- ✅ Lift device sized for the real load, not a guess
- ✅ Secondary support placed before anyone works under or around the machine
- ✅ Wide stable base for dirt, gravel, or asphalt conditions
- ✅ Support points aligned vertically through the load path
- ✅ Clear communication on who is lifting and who is spotting
Sketchy Support Setup
- ❌ One bottle jack doing everything by itself
- ❌ Random lumber, cracked blocks, or greasy cribbing
- ❌ Stand feet half on steel plate and half in mud
- ❌ Attachment left hanging because “the cylinder should hold”
- ❌ No one sure where the escape path is if the machine moves
What not to use: broken pallets, split wood, mystery blocking, cinder blocks, bricks, buckets, or whatever dumb improvised item happens to be within reach. Those are not support devices. They are evidence in the making.
Danger: Cinder blocks and hollow masonry units can fail explosively under point load. Keep them out of lifting setups entirely.
Ground conditions contact points and machine setup
The best jack in the world will still fail you if the surface underneath it is lying.
Before lifting, assess:
- concrete condition in the shop
- slope or crown on the pad
- loose gravel or recently backfilled soil
- heat-softened asphalt
- frozen ground that may thaw under pressure
- mud or washout around the service area
Then stage the machine properly:
- Park on the flattest workable surface.
- Lower attachments when possible.
- Neutralize stored movement by setting brakes, chocking wheels, and following lockout steps.
- Remove loose debris that can affect jack or stand footing.
- Confirm the contact point on the machine is clean, solid, and intended to carry load.
A wide base reduces sink and helps prevent sudden load shifts on imperfect ground.
Mud, grease, and scale between saddle and lift point are all invitations to slip.
Cheap insurance against roll or articulation movement during setup.
Bucket, boom, and body position all affect weight transfer before and during the lift.
If you are working in the field and conditions are questionable, use support mats or steel plates beneath jacks and stands to spread load.
A safe step-by-step lifting procedure
Every crew should have a repeatable lifting sequence. Boring consistency beats freelance creativity here.
1. Plan the job before touching the jack
Know the component being serviced, the expected lift height, the approved lift points, the support devices required, and the no-go conditions. Assign one person to control the lift and one to spot if the job warrants it.
2. Stabilize the machine
Set the parking brake, chock as needed, lower what can be lowered, isolate energy sources where the repair requires it, and make sure bystanders are clear.
3. Stage support equipment first
Do not jack the machine and then go hunting for stands. Put the stands, cribbing, pads, and tools in place before the lift starts.
4. Lift slowly and watch the machine
Raise the machine in small increments. Watch for stand movement, tire roll, articulation shift, jack lean, saddle walk, or sinking at the base.
5. Set mechanical support
Once the machine reaches the needed height, install stands or blocking so the load transfers onto the support. Lower onto that support in a controlled way and confirm it is seated correctly.
6. Test stability before starting work
Apply a cautious shake or push only as allowed by the task and machine condition. You are not trying to move the machine. You are confirming that the setup already is not moving.
7. Keep the jack in place when appropriate
Depending on the procedure, keeping the jack lightly engaged as a backup can help, but it is not the primary support.
8. Reverse the process carefully
When the work is done, clear tools and people, raise slightly to remove blocking, then lower slowly and evenly.
Tip: If the machine does anything unexpected during the first inch of lift, stop. Small weirdness becomes big weirdness when the height increases.
Common mistakes that get people hurt
The ugly part of this topic is how repetitive the mistakes are.
- Crawling under the machine while it is still only on the jack
- Lifting with the attachment in a position that shifts the center of gravity
- Ignoring articulation locks or frame locks where required
- Using wood that is split, oil-soaked, or cut unevenly
- Reaching through pinch zones while the load is still being adjusted
- Letting one person lift while another person improvises support placement
- Working fast because rain is coming or the service truck needs to leave
Case Study: The Three-Minute Shortcut
A crew lifted one side of a skid steer to swap a damaged tire in the field. The ground looked firm, so they skipped the support plate under the jack. Halfway through the wheel change, the jack sank just enough to lean. Nobody got crushed, but the machine dropped, the wheel studs got damaged, and the jobsite lost the machine for the rest of the day. The “time-saving” shortcut created extra repair work and a near miss worth a lot more than three minutes.
Do not confuse “we’ve done it this way before” with “this is actually safe.”
Shop versus field lifting decisions
Not every repair belongs in the field.
Field lifting is reasonable when:
- the repair is simple and well understood
- the ground can be stabilized
- the service vehicle has proper support equipment
- exposure time under the machine is minimal
- weather and visibility are acceptable
Move the machine to the shop when:
- the lift height is significant
- multiple corners or ends of the machine need support
- the job requires extended under-machine access
- the surface is questionable
- the team is already improvising
Field rule: If you need to explain why the field setup is “probably fine,” it probably belongs in the shop.
Shop work is not automatically safe either, but it gives you better floor conditions, better lighting, more controlled tooling, and fewer excuses.
Inspection and storage of lifting support gear
Support equipment needs maintenance too. A jack that leaks down, a bent stand, or rotten cribbing can fail before the machine does.
Inspect regularly for:
- hydraulic leaks or damaged rams
- bent saddles, cracked welds, or twisted frames
- missing stand pins or damaged locking teeth
- wood cribbing splits, crushing, contamination, or rot
- unreadable capacity labels
- rust, corrosion, or deformation from bad storage
Store support gear clean and dry. Keep matched cribbing sets together. Label damaged gear out of service immediately. Do not let the yard turn lifting equipment into a random pile of half-trustworthy junk.
Service Manager Playbook
The best shops treat lifting gear like calibrated safety equipment, not like background clutter. They assign inspection responsibility, keep damaged gear tagged out, and write minimum support requirements into common service jobs so techs are not reinventing the setup every time.
Real-world example a simple tire service that nearly went sideways
A compact wheel loader came in with a slow leak on the front right tire. The repair looked easy: lift the corner, pull the wheel, patch the tire, move on.
What almost went wrong was everything around the tire. The loader was parked on a pad that looked flat but had a slight cross slope. The bucket was not fully lowered. The team had a capable jack but no stand staged yet because someone assumed the wheel would be off quickly. When the machine lifted, the weight shifted just enough to remind everybody how dumb that plan was.
They stopped, reset the loader, lowered the bucket, chocked the opposite wheels, used a support plate under the jack, and transferred the load to a properly rated stand with blocking. The repair then took about the same amount of time it would have taken from the start if they had not tried to shortcut the setup.
Safe lifting usually does not cost much more time. It just demands that people act like the machine weighs what it actually weighs.
How FieldFix helps standardize safe service setups
Lifting incidents repeat when the process lives only in somebody’s head.
FieldFix helps crews document:
- approved lift and support notes by machine
- recurring tire, brake, undercarriage, and wheel-end service tasks
- inspection history for jacks, stands, cribbing, and support plates
- near misses and setup corrections worth sharing across the fleet
- job-specific maintenance checklists so the right support gear is staged before service starts
Standardize the boring stuff before it hurts someone
FieldFix gives maintenance teams a clean place to log service procedures, track support equipment, and document the setups that keep repairs safe and repeatable.
Good jacking and blocking is not glamorous. Neither is not getting crushed. Pick your boring.