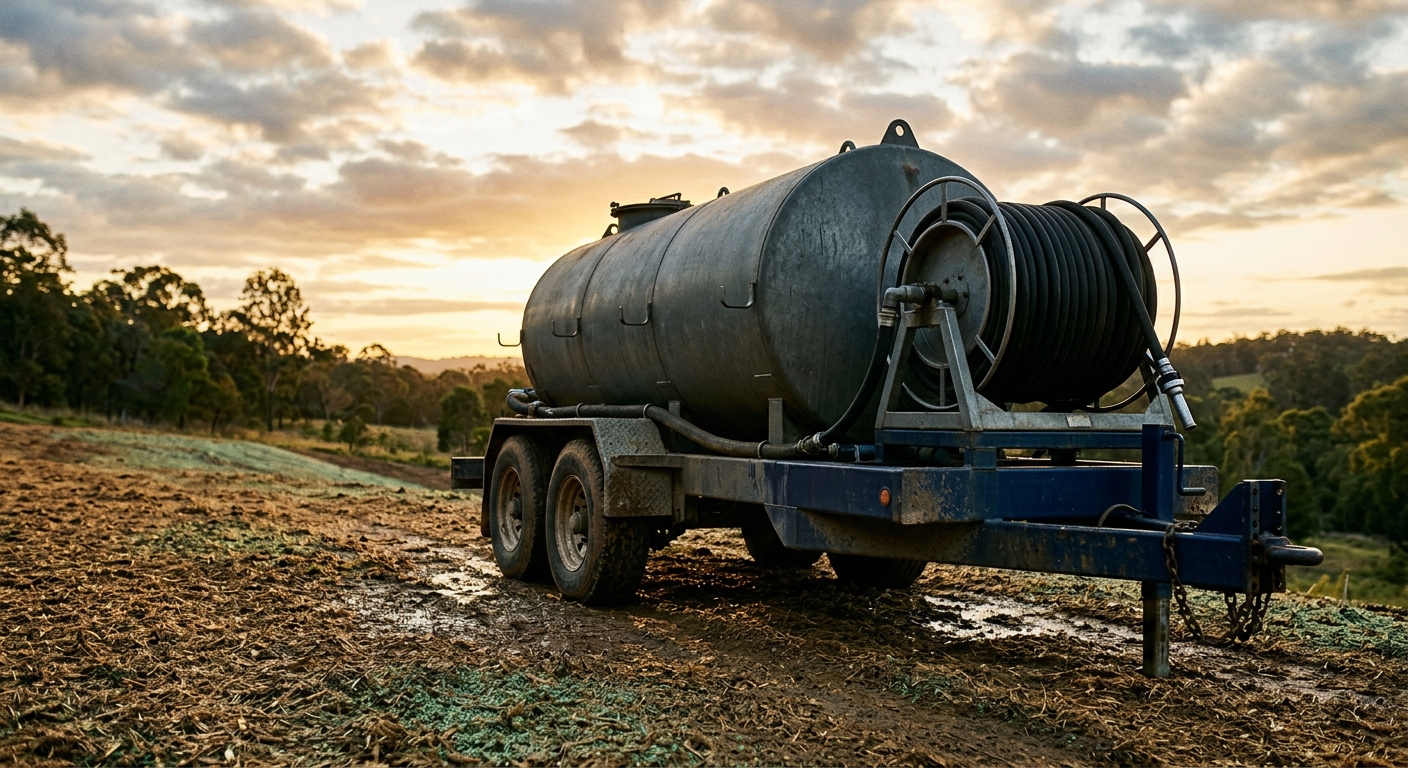
Hydroseeder Maintenance Guide: Keep Tanks, Pumps, Hoses, and Agitation Systems Ready for Work
Learn how to maintain a hydroseeder with practical checks for tanks, pumps, hoses, agitation, cleanup, and storage to prevent clogs, leaks, and downtime.
Key takeaways:
- Hydroseeders usually fail because of skipped cleanup, dried mulch residue, suction leaks, worn nozzles, or neglected pump seals
- The expensive problems are predictable: clogged valves, weak spray pattern, agitation issues, hose damage, and corrosion inside a tank that looked “good enough”
- A repeatable daily washout routine matters more than heroic troubleshooting after the machine hardens up overnight
- Storage discipline is where fleets either protect a hydroseeder for years or quietly ruin one between jobs
- Good maintenance records help crews separate operator habit problems from true component wear
Hydroseeders look simple from a distance. Big tank. Water. Seed. Mulch. Hose. Spray it out and move on. That simplicity is exactly why crews abuse them.
The machine still pumps, so nobody flushes it thoroughly. The hose is a little stiff, so somebody keeps using it. The agitation sounds rough, but the job got done, so it goes back in the yard until next week. Then the next crew loads the tank, opens the valve, and finds out the machine has turned into an expensive papier-mache cannon.
That is the pattern. Hydroseeder failures are usually not mysterious. They are slow-building maintenance problems that get excused because the machine is not used every hour of every day like a skid steer or excavator. But when a hydroseeder goes down, the job gets weird fast. Crews wait around. Material sits. Weather windows tighten. The site still needs stabilization, and now your machine is coughing mulch paste through a half-plugged line.
This guide breaks down the maintenance routine that keeps a hydroseeder dependable: tank care, pump inspections, hose management, agitation checks, cleanup, storage, and the small warning signs that tell you the machine is heading toward downtime.
Why hydroseeder maintenance gets neglected
Hydroseeders live in an awkward category. They are not “heavy iron” in the classic sense, but they still work in dirty, wet, abrasive conditions with pumps, plumbing, valves, and moving components that absolutely punish neglect.
The problem is cultural as much as mechanical. Crews often treat hydroseeders like temporary-use equipment instead of production equipment. If the machine only comes out for certain jobs, people assume it can sit dirty for a day or two without consequence. That assumption is garbage.
Seed, mulch, tackifier, fertilizer, and additives create a sticky abrasive mix. If it dries in the wrong place, it becomes a blockage. If it sits against metal too long, it traps moisture and promotes corrosion. If it moves through a worn pump or leaking suction line, performance drops off before most crews even realize there is a mechanical issue.
Info: Hydroseeder maintenance is really a contamination-control job. The machine does best when residue never gets a chance to harden, settle, or hide wear points.
What actually fails on a hydroseeder
Before you build a maintenance routine, it helps to know where the pain usually starts.
Common hydroseeder problem areas include:
- pump seals and bearings
- suction plumbing and air leaks
- clogged strainers, valves, and nozzles
- agitation paddles or recirculation systems
- hose outer jacket damage and soft spots
- tank interior buildup and corrosion
- worn couplings, clamps, and gaskets
- engine or power unit issues on trailer-mounted machines
The ugly part is that these failures stack. A slightly leaking suction connection can reduce pump efficiency. That weaker flow leads crews to run the machine harder or longer. Poor cleanup follows because the day is already behind. The leftover slurry hardens in a nozzle body or bypass line. Next job, somebody assumes the pump is dying when the real story started two weeks earlier.
- Strong consistent spray pattern
- Predictable agitation and mix quality
- Clean valve operation with no sticking
- Hoses that stay flexible without seepage
- Tank interior that flushes clean without buildup
- Spray pattern gets weak or uneven
- Pump sounds harsher or cavitates during loading
- Nozzles clog more often than normal
- Residue stays packed in corners after rinse-out
- Valves, clamps, or hose ends seep under pressure
Daily checks before loading material
Daily checks do not need to become a ceremony. They do need to be consistent.
Start with the tank interior. If yesterday’s cleanup was weak, you need to know before loading fresh material on top of old residue. Look for clumps, dried material around baffles, packed corners, and any slimy or hardened areas around the outlet.
Then inspect the fluid path:
- Suction side: check hose condition, clamps, fittings, and strainers.
- Pump area: look for seepage, drips, noisy bearings, or signs of seal failure.
- Discharge plumbing: inspect valves, nozzle bodies, and recirculation lines.
- Main hose: look for abrasions, bubbles, cuts, flattened spots, and damaged couplings.
- Agitation system: make sure paddles, jets, or recirculation components are not obstructed.
If the hydroseeder has its own engine, include the basics every time:
- engine oil
- coolant
- air filter condition
- battery terminals and cables
- fuel level and visible leaks
- belt condition where applicable
Tip: Prime-time failures often begin on the suction side. A tiny air leak can mimic bigger pump problems. If output gets inconsistent, inspect clamps, fittings, and hose condition before blaming the pump itself.
Operators should also check the spray gun, nozzle set, and remote controls if equipped. Bent hardware, cracked handles, or sticky trigger action get worse under pressure, not better.
Best practices during operation
Hydroseeder maintenance is not just a before-and-after issue. How the machine is run matters.
One of the fastest ways to shorten pump life is running the machine with poor water supply discipline or inconsistent material mixing. If the tank recipe is sloppy and the slurry clumps, the system works harder. If operators let the tank level get too low while recirculation is still aggressive, pumps can cavitate and seals suffer.
During operation, crews should:
- add material in a controlled sequence so the mix stays consistent
- watch for changes in pump tone or spray pressure
- keep an eye on hose routing to avoid sharp kinks and pinch points
- clear nozzle restrictions early instead of overpowering the blockage
- monitor engine temperature and power-unit vibration
Field example: the “bad pump” that was really a bad habit
A contractor thought the hydroseeder pump was failing because output got weaker every afternoon. The actual issue was loading technique. Crews were dumping mulch too fast, creating clumps that partially blocked flow and forced longer recirculation. Cleanup at the end of the day was rushed, so residue kept building in the plumbing. Once the loading sequence and flush-out routine were fixed, the “failing pump” suddenly looked a lot healthier.
That is a common theme. Operator habit creates the condition, then maintenance gets blamed for the symptom.
The cleanup routine that prevents most problems
If you remember one thing from this guide, remember this: the cleanup routine is the maintenance routine.
Do not park a hydroseeder dirty unless you enjoy chiseling dried mulch out of expensive plumbing later.
An effective cleanup routine should include:
1. Empty the tank as completely as practical
Do not leave a heavy layer of slurry in the bottom and promise yourself you will deal with it tomorrow. Tomorrow is where the regret lives.
2. Flush the tank with clean water
Run enough rinse water through the tank to loosen and move remaining material. Pay attention to corners, baffles, outlet areas, and any ledges where residue collects.
3. Circulate rinse water through the pump and plumbing
This matters just as much as rinsing the tank itself. Open and cycle valves so clean water reaches the paths where residue loves to hide.
4. Flush the main hose and nozzle assemblies
Hoses are where lazy cleanup turns into next-job embarrassment. Flush until discharge runs clean, then inspect for leftover buildup at the gun and nozzle body.
5. Clean strainers and screens
Do not just glance at them. Remove and inspect them. A half-clogged strainer quietly drags down performance and makes the whole system seem weaker.
6. Leave the unit ready, not merely less dirty
That means valves functional, hose drained appropriately, visible residue removed, and no thick material sitting in dead spots.
Warning: Pressure-washing the outside of a hydroseeder does not count as internal cleanup. A clean-looking machine with mulch packed in its pump circuit is still a maintenance failure waiting for an audience.
Weekly and monthly service points
Daily checks keep you alive. Weekly and monthly service keeps the machine from aging badly.
Each week, inspect:
- pump mounting bolts and coupling condition
- hose racks, reels, and storage points
- agitation paddles or recirculation fittings
- trailer tires, hubs, lights, and breakaway equipment on tow-behind units
- spray gun wear, nozzle condition, and shutoff smoothness
- tank interior coating or early rust spots
Monthly or on a defined usage interval, go deeper:
- inspect pump seals and bearing play
- replace worn gaskets or suspect clamps
- check valve handles, stems, and seats for sticking or leakage
- inspect engine service items per manufacturer schedule
- verify safety chains, jack, and trailer frame condition
- touch up exposed metal where slurry and moisture have worn paint away
Repair now versus monitor later
Not every flaw means instant shutdown. But some do.
Repair now when you find:
- leaking hose ends under pressure
- pump seal leakage that is actively worsening
- cracked couplings or damaged clamps
- agitation components contacting where they should not
- nozzles or valves that will not operate reliably
- trailer safety defects on towable units
Monitor closely, schedule repair soon, and document the condition when you find:
- light surface corrosion in accessible tank areas
- minor hose outer-jacket wear that has not exposed reinforcement
- slight spray pattern inconsistency after confirming no blockage
- early seepage at a fitting that may only need resealing
Field example: small hose damage, big schedule problem
A crew kept running a hydroseeder hose with a rubbed section near the coupling because “it was only the outer layer.” Under pressure, the weak spot opened up, soaked the crew, dumped material where it was not supposed to go, and forced an on-site hose swap. The replacement part was cheap. The lost production window was not.
Good maintenance teams do not confuse “still works” with “acceptable condition.”
Storage and offseason protection
Hydroseeders get punished during storage because people assume inactivity equals safety. It does not.
Before extended storage:
- clean the tank and plumbing thoroughly
- drain water where freezing is a risk
- protect pumps and lines according to manufacturer guidance
- inspect and dry hoses before coiling them for storage
- stabilize fuel if the power unit will sit
- disconnect or maintain the battery appropriately
- cover exposed controls and protect vulnerable fittings
If the machine is stored outside, pay attention to standing water, UV exposure, and freeze damage. Hoses, seals, paint, wiring, and trailer components all age faster when the unit sits dirty and weather-beaten.
Danger: Freeze damage is brutal because it often stays hidden until the next startup. Water trapped in pumps, valves, or plumbing can crack components internally and turn the first spring job into a leak hunt.
Build a better hydroseeder maintenance system
The best hydroseeder maintenance program is not fancy. It is documented, repeatable, and hard to skip.
Create a simple process with:
- a pre-load inspection checklist
- a required post-job flush-out checklist
- weekly service ownership
- clear standards for hose replacement and clamp repair
- photo logging for recurring trouble spots
- seasonal storage and recommissioning notes
If multiple crews use the same machine, documentation matters even more. Otherwise every problem turns into a shrug and a story about how it “was already like that.”
FieldFix-style maintenance tracking helps here because hydroseeders often suffer from intermittent use. When a machine only works certain jobs, memory gets fuzzy. Logged notes, photos, and service history give you something better than guesses. You can see whether the same nozzle keeps clogging, whether one hose fails every season, or whether cleanup quality drops with certain crews.
Keep your hydroseeder ready before the next weather window closes
Hydroseeder downtime usually starts as a cleanup shortcut, a small leak, or a component nobody wanted to replace yet. Track inspections, flush-out routines, hose issues, and repair history in one place so the next crew is not inheriting a surprise. FieldFix helps you log service work, attach photos, and build maintenance habits that protect production.
Related Articles

August 23, 2026
Heavy Equipment Grease Gun Maintenance Guide: Clean Tools, Longer Pin Life
August 22, 2026
Portable Pressure Washer Maintenance Guide for Contractors: Pumps, Hoses, Nozzles, and Winter Protection

August 21, 2026