Heavy Equipment Grease Points: The Complete Lubrication Guide
Master heavy equipment greasing with our complete guide to grease points, intervals, and techniques. Prevent costly repairs with proper lubrication.
Key Takeaways
- Grease daily — Most heavy equipment requires greasing every 8-10 operating hours
- Count your zerks — A typical excavator has 30-50+ grease points; missing even one leads to premature wear
- Use the right grease — NLGI #2 multipurpose is standard, but always check your manual
- Pump until purge — Old grease (dark or discolored) should purge out before you stop
- Track everything — Missed grease intervals are the #1 cause of pin and bushing failures
Every equipment owner knows they should grease their machines. Few actually do it right.
We’ve seen $15,000 boom cylinder repairs traced back to a single missed grease point. We’ve watched operators spend 45 minutes chasing phantom hydraulic problems that turned out to be dry pins squeaking under load.
Greasing isn’t glamorous. It’s not the reason you bought an excavator or skid steer. But it’s the difference between a machine that runs for 10,000 hours and one that becomes a parts donor at 3,000.
This guide covers everything you need to know about heavy equipment lubrication—from finding every grease point to building a system that ensures you never miss one.
Why Greasing Matters More Than You Think
Let’s start with what happens when you skip greasing.
Metal-on-metal contact creates heat, friction, and wear. Grease creates a protective barrier that:
- Reduces friction between moving parts
- Prevents corrosion from moisture and contaminants
- Dissipates heat generated by movement
- Seals out dirt that would accelerate wear
- Extends component life dramatically when done consistently
The math is simple: a $200 grease gun and $50 in grease per month versus $15,000+ in repairs. There’s no scenario where skipping lubrication makes financial sense.
A slightly dry pin doesn't fail immediately. It wears gradually, creating slop. That slop creates uneven loading. Uneven loading accelerates wear on connected components. What started as a missed grease point becomes a cascade of failures across multiple systems.
Understanding Grease Points
Grease points (also called grease fittings, zerks, or grease nipples) are small valves that allow you to inject lubricant into pivot points and bearings.
Anatomy of a Grease Fitting
The standard grease fitting is a Zerk fitting (named after Oscar Zerk, who patented it in 1929). Key components:
- Ball check valve — Allows grease in, prevents it from escaping
- Hex head — Provides grip for removal if needed
- Threaded shank — Screws into the component
- Nipple — Where your grease gun coupler attaches
Most fittings are standard 1/8” NPT thread, but metric versions exist on imported equipment.
Types of Grease Points
Standard Zerks — The most common, straight or angled fittings accessible from the exterior.
Recessed Zerks — Flush-mounted fittings that require a needle adapter to reach.
Remote Grease Banks — Multiple lines routed to a central location for easier access. Common on newer excavators.
Auto-Lube Systems — Automatic greasers that dispense lubricant at preset intervals. Still require monitoring and refilling.
Where Grease Points Live
Every pivot point that moves under load needs lubrication. On heavy equipment, that means:
- Boom, stick, and bucket pins — The working end takes the most abuse
- Swing bearing — Supports the entire upper structure
- Track components — Idlers, rollers, and tensioner (if equipped)
- Linkage pivots — Any connection point in the control linkage
- Cylinder pivots — Where hydraulic cylinders attach
- Blade/bucket cutting edges — Quick-attach mechanisms
Equipment-Specific Grease Maps
Different machines have different lubrication requirements. Here’s what to expect:
Excavators (20-40+ Grease Points)
Typical Excavator Grease Point Breakdown
Boom Assembly (8-12 points)
- Boom foot pin (2 zerks)
- Boom cylinder rod end (2)
- Boom cylinder base end (2)
- Boom-to-stick connection (2-4)
Stick Assembly (6-10 points)
- Stick cylinder rod end (2)
- Stick cylinder base end (2)
- Stick-to-bucket connection (2-4)
Bucket Assembly (4-8 points)
- Bucket cylinder rod end (2)
- Bucket cylinder base end (2)
- Bucket link pins (2-4)
Swing System (4-8 points)
- Swing bearing (varies by model)
- Swing motor pinion
Undercarriage (8-16 points)
- Track idlers (2-4)
- Track rollers (may be sealed)
- Track tensioner grease cylinder
Skid Steers / Track Loaders (15-30 Grease Points)
Compact equipment has fewer pivot points but requires equally consistent attention:
- Lift arm pins (4-6 points)
- Tilt cylinder connections (4 points)
- Bucket/attachment mount (2-4 points)
- Drive motor mounts (2-4 points)
- Track idlers and rollers (varies by model)
- Door hinges and latches (often forgotten)
Dozers (25-50+ Grease Points)
Track-type tractors have extensive undercarriage requirements:
- Blade lift cylinders (4 points)
- Blade tilt cylinders (4 points)
- Blade pivot pins (4-6 points)
- Ripper assembly (6-12 points if equipped)
- Track frames (4-8 points)
- Track rollers/idlers (varies widely)
Every machine should have a lubrication chart in the operator's manual. If you don't have the manual, check the manufacturer's website or contact your dealer. Some machines have the grease point diagram on a sticker inside the cab or on the boom.
Choosing the Right Grease
Not all grease is created equal. Using the wrong lubricant can be as bad as using none at all.
Understanding Grease Grades (NLGI)
The National Lubricating Grease Institute (NLGI) rates grease consistency from 000 (semifluid) to 6 (block grease). For heavy equipment:
Grease Base Types
Lithium Complex — The most common and versatile. Works well for general-purpose applications, handles heat and water reasonably well.
Calcium Sulfonate — Superior water resistance and rust protection. Excellent for equipment working in wet conditions.
Polyurea — Longer service life and better high-temperature performance. Often used in sealed-for-life bearings.
Moly (Molybdenum Disulfide) — Contains solid lubricant particles for extreme pressure applications. Good for pins and bushings under heavy load.
Different grease bases can be chemically incompatible. Mixing them may create a substance that doesn't lubricate at all. If switching grease types, purge the old grease completely before introducing the new one.
What Your Manual Says
Your operator’s manual specifies:
- Required grease type
- NLGI grade
- Grease intervals
- Grease quantity per point
When in doubt, use a quality NLGI #2 lithium complex multipurpose grease with EP (extreme pressure) additives. It handles most applications adequately.
Greasing Techniques That Actually Work
Knowing where to grease is half the battle. Knowing how is the other half.
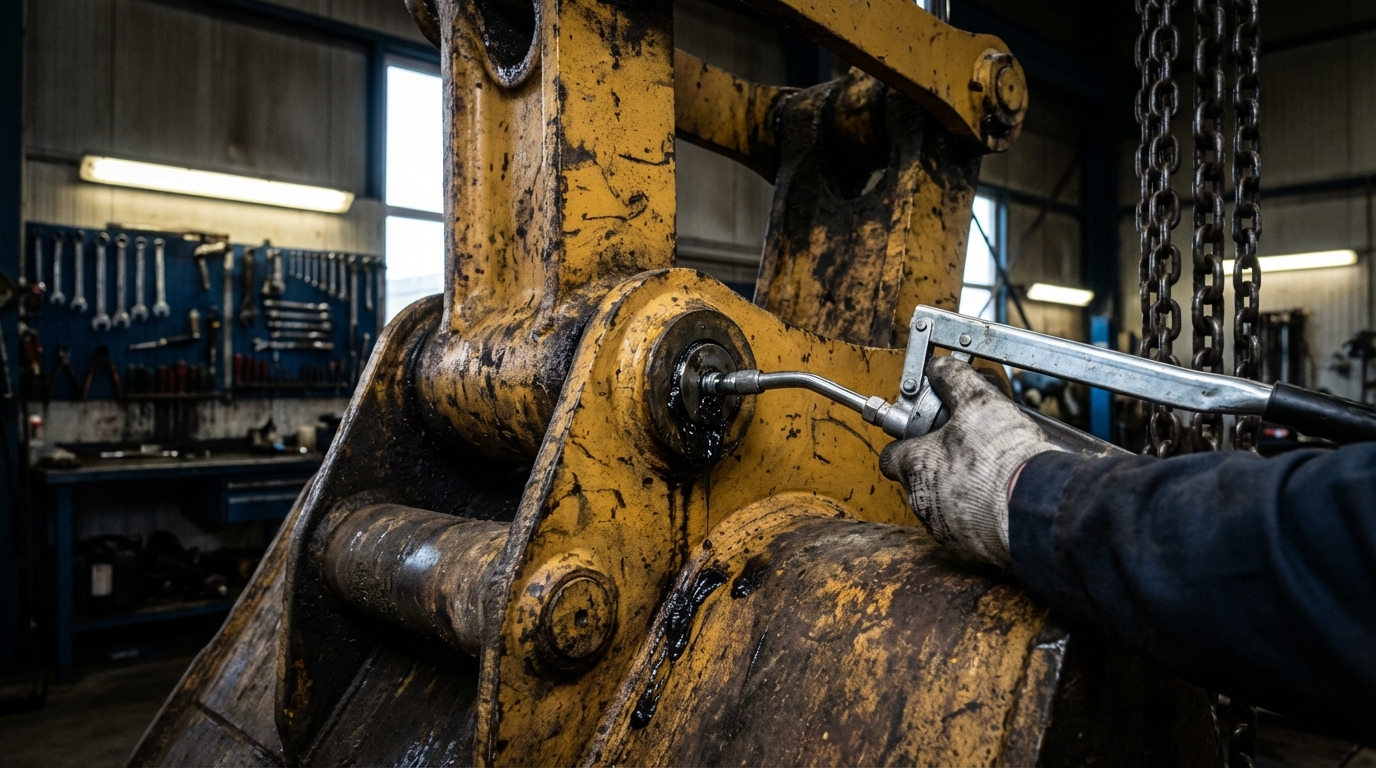
The Pump-Until-Purge Method
This is the gold standard for manual greasing:
- Locate the fitting and wipe it clean
- Attach grease gun coupler firmly
- Pump slowly — rushing forces grease past seals
- Watch for purge — Old, dark grease should emerge around the pin
- Stop when fresh grease appears — Bright, clean grease indicates full displacement
- Wipe excess — Prevents dirt accumulation
For most pins: 2-5 pumps from a standard hand grease gun. For swing bearings: follow manufacturer specs (often 50+ pumps or measured by gun strokes). The purge method ensures you're not guessing.
Positioning Your Machine
Some grease points are only accessible in certain positions:
- Cycle the boom to access different sides of pivot pins
- Swing the upper structure to reach undercarriage points
- Curl and uncurl the bucket to expose linkage zerks
- Raise and lower the blade on dozers to access cylinder connections
Make greasing part of your pre-operation routine when the machine is already being moved around.
Dealing with Stubborn Fittings
Clogged or damaged fittings are common. Here’s how to handle them:
Won’t take grease:
- Remove the fitting with a wrench
- Clean threads with a wire brush
- Check for blockage in the grease passage
- Replace fitting if damaged
Coupler won’t attach:
- Clean the fitting nipple
- Check coupler jaws for wear
- Try a different grease gun
- Replace fitting if deformed
Grease leaks out immediately:
- Ball check may be failed — replace fitting
- Seal may be blown — inspect and repair
- Component may be worn — check for excessive play
Common Greasing Mistakes
Even experienced operators make these errors:
❌ Mistakes to Avoid
Over-greasing seals — Too much pressure blows out seals, allowing dirt in. If you feel unusual resistance, stop and investigate.
Greasing at the wrong angle — Some zerks only accept grease with the joint in a specific position. Check your manual.
Skipping the undercarriage — Out of sight, out of mind. Track components need love too.
Using the wrong grease — Automotive wheel bearing grease isn’t the same as equipment grease. Use what’s specified.
Greasing dry fittings — Clean the zerk first. Pushing dirt into the bearing defeats the purpose.
Inconsistent schedules — Greasing heavily one week then forgetting for a month creates uneven wear patterns.
The “It Has Auto-Lube” Trap
Automatic lubrication systems are convenient but not foolproof:
- Reservoirs need refilling
- Lines can clog or break
- Settings may not match actual usage
- Some points aren’t connected to the system
Always verify your auto-lube is actually working. Check reservoir levels and inspect grease purge at random points weekly.
Creating a Greasing Schedule
Consistency beats intensity. Here’s how to build a system:
Standard Intervals
Typical Greasing Frequency
| Component | Interval |
|---|---|
| Boom, stick, bucket pins | Every 8-10 hours |
| Cylinder pivots | Every 8-10 hours |
| Swing bearing | Every 50 hours |
| Track idlers/rollers | Every 50 hours |
| Linkage pivots | Every 8-10 hours |
| Quick-attach mechanism | Every 8-10 hours |
Always defer to your operator’s manual for exact specifications.
Daily Routine (8-10 Hour Interval)
Most operators should grease every day or every other day depending on usage:
- Before starting — Grease takes 10-15 minutes
- Walk-around inspection — Check for leaks while greasing
- Document completion — Log the date and hours
Extended Interval Points (50+ Hours)
Some components need less frequent attention:
- Swing bearings
- Sealed track rollers (if not sealed-for-life)
- Blade pivot pins on dozers
- Major frame pivots
Track these separately from daily items.
Signs You're Not Greasing Enough
Your machine will tell you when lubrication is lacking:
Squeaking or squealing — Metal-on-metal contact under load creates noise. By the time you hear it, damage is occurring.
Excessive heat — Touch pivot pins after operation (carefully). Hot pins indicate friction.
Visible slop — Play in pins and bushings that wasn’t there before.
Binding movement — Boom or bucket moves unevenly or catches.
Rust or corrosion — Grease protects against moisture. Rusty zerks suggest neglect.
Dark, gritty purge — Old contaminated grease indicates intervals are too long.
The Cost of Waiting
Once wear begins, greasing won’t reverse it:
- Minor wear leads to slop
- Slop creates uneven loading
- Uneven loading accelerates wear
- Eventually, components require replacement
The pin and bushing job you’re avoiding today will cost 10x what consistent greasing would have.
Tools and Equipment
Invest in proper greasing tools:
Grease Guns
Manual lever guns — Most common, affordable, reliable. Requires physical effort but provides good feedback.
Pistol-grip guns — Easier one-handed operation for tight spaces.
Battery-powered guns — Faster, more consistent pressure, worth the investment for larger fleets.
Air-powered guns — Fast for shop use but requires compressor access.
Accessories
- Flex hoses — Reach recessed or awkward fittings
- Needle adapters — For flush-mounted zerks
- Grease coupler rebuild kits — Couplers wear out; rebuilding is cheaper than replacing
- Zerk fitting kits — Various sizes and angles for replacements
Grease Selection
Buy quality grease in bulk:
- 35 lb pails for shop use
- 14 oz cartridges for field service
- Consider a grease pump for high-volume operations
Tracking Your Lubrication
The best greasing schedule is useless if you don’t track completion.
Manual Tracking
At minimum:
- Logbook in the cab — Date, hours, operator initials
- Checklist printed on the machine — Laminated, attached near the seat
- Service board in the shop — Visual status for all machines
Digital Tracking
Modern fleet management makes tracking automatic:
FieldFix lets you log service tasks including greasing, attach them to specific hour readings, and set up interval-based reminders. Never guess when a machine was last greased — the data is always there.
Digital tracking provides:
- Hour-based interval alerts — Reminders when greasing is due
- Service history — Know exactly when each machine was last serviced
- Accountability — Which operator completed the task
- Pattern recognition — Identify machines that consistently get neglected
Building Accountability
If you have operators:
- Make greasing part of the pre-operation checklist
- Inspect randomly — Check for fresh grease purge
- Review service logs — Look for gaps in greasing entries
- Connect pay to compliance — Operators who maintain equipment are worth more
Never Miss Another Grease Interval
FieldFix tracks your equipment hours and sends maintenance reminders automatically. Log service tasks in seconds, see your complete maintenance history, and know exactly when every machine needs attention.
Build the Habit, Save the Machine
Greasing isn’t complicated. Finding the zerks, pumping the grease, wiping up the excess — an operator with a routine can service an excavator in 15 minutes.
The hard part is consistency. Doing it every single day. Not skipping when you’re busy. Not assuming someone else did it.
Build the system:
- Know every grease point on your machines
- Set a non-negotiable schedule
- Track completion religiously
- Inspect for compliance
Your machines will reward you with longer component life, fewer breakdowns, and higher resale value.
The alternative — premature wear, expensive repairs, and unexpected downtime — costs far more than the time and grease required to prevent it.
Start greasing properly today. Your future self (and your bank account) will thank you.