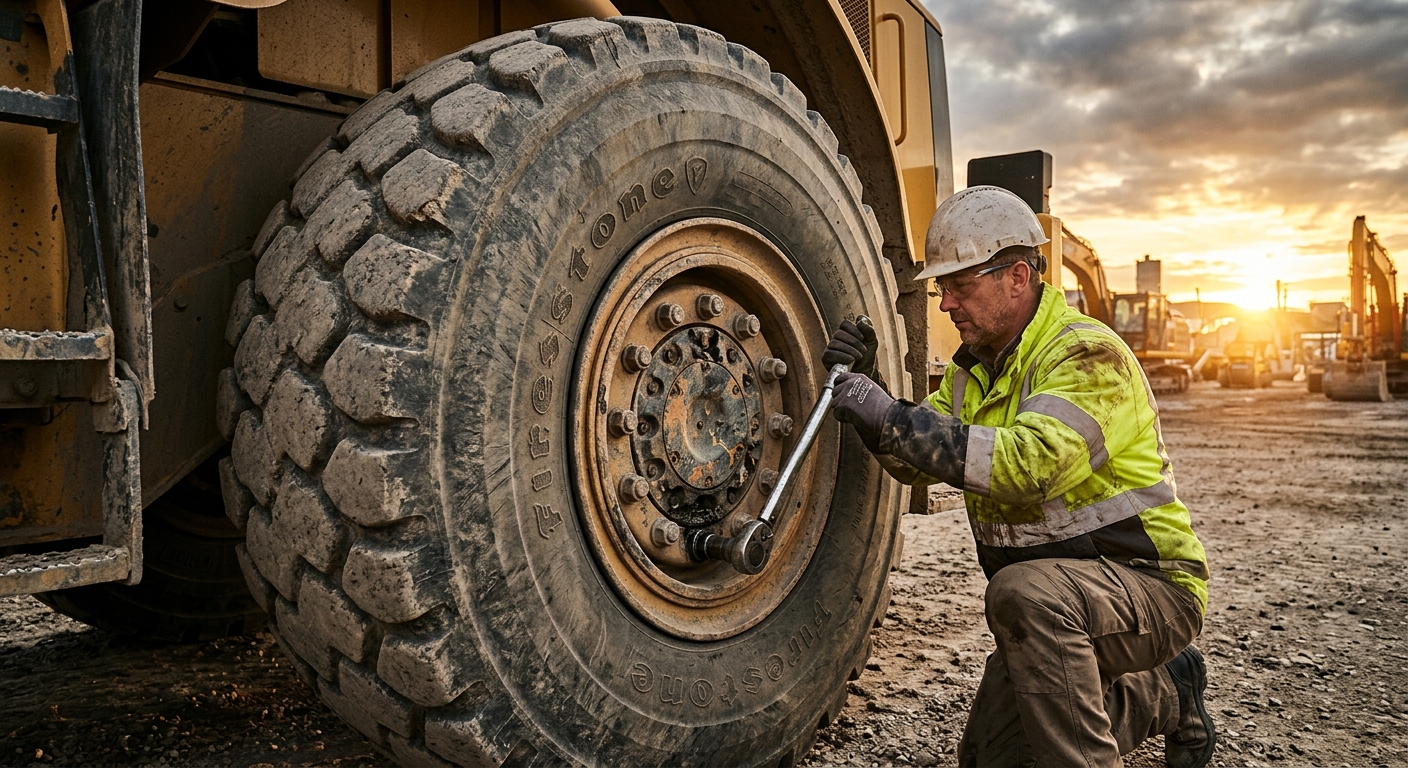
Heavy Equipment Wheel Lug Torque Maintenance Guide: Prevent Wheel-Off Failures and Costly Downtime
Learn how to inspect wheel studs, torque lug nuts correctly, spot loosening early, and prevent dangerous wheel-off failures on heavy equipment fleets.
Key Takeaways:
- Wheel-off failures usually start with basic issues: wrong torque, dirty mating surfaces, stretched studs, or skipped re-torque checks
- A loose wheel does not stay a cheap problem for long. It turns into damaged studs, ovaled holes, hub damage, downtime, and a major safety risk
- Torque specs, tightening sequence, and re-torque timing matter more than brute force
- Operators can catch a lot early by watching for rust trails, shiny movement marks, vibration, and hot hubs
- Tracking wheel service history in FieldFix makes repeat loosening problems easier to trace back to the actual cause
Wheel hardware is not glamorous, which is exactly why crews miss it. People focus on engines, hydraulics, undercarriages, and tires. Meanwhile a wheel end can start working loose from one bad install, one skipped re-torque, or one damaged stud and nobody notices until the machine starts vibrating on the job.
That is how expensive nonsense begins.
On wheel loaders, graders, articulated dump trucks, compactors, backhoes, telehandlers, skid steers with over-the-tire setups, trailers, and service trucks, loose wheel hardware can snowball fast. A wheel-off event can wreck a hub, destroy rims, damage fenders and brake components, and create a serious injury risk for operators and anyone nearby.
The good news is this is one of the more preventable failures in a fleet. A disciplined torque procedure, clean mounting surfaces, and a re-torque schedule solve most of it. This guide walks through what actually matters and where shops screw it up.
Why Wheel Lug Torque Gets Overlooked
Most teams assume wheel hardware is simple: tighten it, send it, move on. That attitude is how you get repeat failures.
Wheel clamping force depends on more than the final number on a torque wrench. It depends on stud condition, nut condition, clean mating surfaces, correct lubrication rules, wheel fit, tightening pattern, and re-torque timing after the wheel seats in service.
If your crew treats wheel torque like a one-and-done chore, you are gambling with one of the most basic safety systems on the machine.
Important: Always use the OEM torque specification and wheel hardware guidance for the exact machine, wheel, and stud setup. Generic torque charts are not a substitute when the manual gives a specific number.
What Causes Wheel Nuts To Loosen
Loose wheel nuts are usually the result of lost clamping force. That force disappears for a handful of common reasons.
The first is dirty or damaged mating surfaces. If rust scale, paint buildup, debris, or burrs sit between the wheel and hub, the hardware may torque correctly at first but lose clamp load once that material crushes or shifts.
The second is worn or stretched hardware. Studs that have been overtorqued, nuts with damaged seats, or mismatched components do not clamp consistently. Shops love reusing bad hardware because it looks fine from six feet away. Bad habit.
The third is incorrect tightening technique. Hammering nuts on with an impact and calling it good is not a torque procedure. It is a shortcut that hides unequal loading and can leave some studs barely carrying any clamp force at all.
The fourth is wheel movement after installation. Freshly mounted wheels can seat in further under load and vibration. That is why re-torque is not optional after wheel service.
Loose Wheel Root Causes
Most Common Causes
- ✅ Dirty hub or wheel mounting surface
- ✅ Wrong torque value or no final torque check
- ✅ Skipped star-pattern tightening
- ✅ Reused damaged studs or nuts
- ✅ No re-torque after installation
Common Bad Assumptions
- ❌ “The impact gun is close enough”
- ❌ “If it is tight once, it is tight forever”
- ❌ “A little rust does not matter”
- ❌ “Only road trucks need re-torque checks”
On heavy equipment, shock loads, uneven terrain, and repeated braking or side-loading can accelerate any weakness already present in the wheel end.
The Warning Signs Before a Wheel-Off Event
Wheel hardware problems usually give you clues before they turn into a full failure.
Operators and techs should watch for:
- Rust trails radiating from studs or nut seats
- Shiny witness marks showing movement between the wheel and hub
- Elongated or wallowed wheel holes
- Repeated nut loosening on the same wheel position
- Vibration, wobble, or steering pull that was not there before
- Clicking or clunking from a wheel end during travel
- Heat at the hub after a short run
Warning: If you see rust streaks or witness marks around lug seats, the wheel has probably been moving already. That is not a “watch it next week” issue. Pull it from service and inspect it properly.
Case Study: Loader Wheel Keeps Coming Loose
A contractor retorqued the same front loader wheel three times in one month and blamed rough terrain. The real problem was painted-over mating surfaces plus two stretched studs from a previous overtorque event. The wheel kept losing clamp load after a few shifts. Once the wheel face was cleaned to bare contact metal and the damaged hardware was replaced, the repeat loosening stopped.
That pattern matters. If one wheel position keeps having trouble, the answer is usually not “tighten it harder.” The answer is find out why it cannot hold clamp force.
How To Torque Wheel Hardware Correctly
Good torque work is boring, methodical, and worth every minute.
Start by cleaning the hub face, wheel contact surface, studs, and nuts. Remove rust flakes, packed dirt, and burrs. Inspect for cracks, seat damage, thread damage, and elongation around holes. If the hardware or wheel is questionable, stop there and address it before assembly.
Then follow the OEM rule on lubrication. Some wheel systems require dry threads. Some allow only specific lubrication points or light oil on threads but dry nut seats. Guessing here will throw off clamp load because torque is only an indirect measurement of stretch.
Use a proper star or cross pattern so the wheel seats evenly. Bring the nuts up in stages instead of blasting straight to final torque. A staged sequence like 30 percent, 60 percent, then final spec works better than one pass.
After the final torque, mark the nuts if your shop uses visual torque marks. They are not a substitute for measurement, but they can make movement easier to spot during daily checks.
Pro tip: Use the impact gun only to snug hardware if your procedure allows it. Final tightening should be done with a calibrated torque wrench or approved torque-multiplying setup, not vibes and wishful thinking.
Here is the basic process most fleets should follow:
- Clean and inspect all contact surfaces and hardware
- Verify correct wheel, nuts, washers, and stud type
- Follow OEM lubrication guidance exactly
- Tighten in the correct sequence
- Torque in stages to final spec
- Record the service and schedule the re-torque check
That last step matters more than people think. If the service is not documented, the re-torque gets forgotten.
When Re-Torque Is Non-Negotiable
Any time a wheel has been removed, installed, replaced, or serviced, plan a re-torque check. That includes tire replacement, brake work, hub service, stud replacement, and any repair that disturbed the wheel end.
The exact re-torque interval depends on the equipment and OEM guidance, but the principle is the same: after initial use, confirm the clamp load stayed where it belongs.
Danger: Repeatedly re-torquing a problem wheel without disassembly is how fleets talk themselves into a wheel-off event. If a wheel loosens twice, treat that as a failed inspection and tear it down.
For machines that run hard over rough haul roads, uneven jobsites, or curb-heavy urban work, you may also want wheel hardware checks built into regular PM intervals even when no wheel service was done recently.
Studs, Nuts, and Wheels: Repair or Replace
This is where false economy shows up.
If a stud has stretched threads, necking, corrosion pitting, or damage from overtorque, replace it. If a nut has a damaged seat, poor thread engagement, or visible galling, replace it. If the wheel holes are elongated or the seat faces are beat up, do not pretend torque will solve it.
Repair vs Replace
Usually Replace
- ✅ Stretched or necked studs
- ✅ Galled or rounded nuts
- ✅ Wheels with elongated holes
- ✅ Cracked rims or damaged nut seats
Sometimes Clean and Reuse
- ✅ Hardware that passes inspection and matches spec
- ✅ Minor surface corrosion outside critical contact areas
- ✅ Wheels with no movement marks and clean seat geometry
Cheap hardware decisions create expensive failures later. A new set of studs and nuts is a bargain compared to a wheel coming off on a travel lane or active jobsite.
Building a Wheel Hardware Inspection Routine
A useful wheel hardware routine does not need to be complicated. It needs to be consistent and tied to real triggers.
Daily operator walkarounds should include a fast visual check for missing nuts, rust trails, shiny movement marks, obvious wheel damage, and signs of tire or rim contact where it should not be happening.
Weekly or scheduled PM checks should go deeper:
- Look for damaged stud threads and nut seats
- Check torque witness marks if used
- Inspect wheel holes and mating surfaces when wheels are off
- Review any recent tire or brake work
- Log repeat issues by machine and wheel position
Case Study: Service Truck Rear Wheel Failure Avoided
A tech noticed fresh orange rust lines around one rear wheel on a field service truck during a routine fuel stop. The truck had recent brake work. Inspection found two nuts had lost clamp load because the wheel was not re-torqued after installation. Catching it early prevented damage to the dual assembly and kept the truck from failing on the highway.
This is exactly why the boring checks matter. You are not looking for drama. You are looking for the first little hint that the wheel end has started moving.
Common Shop Mistakes That Create Repeat Failures
Plenty of wheel hardware problems are shop-created.
The biggest mistakes:
- Using the wrong torque spec from a different machine or generic chart
- Final-tightening with an impact instead of a measured tool
- Ignoring damaged wheel seats and blaming the operator
- Mixing hardware styles or reusing questionable studs
- Skipping the re-torque because “it will be fine”
- Failing to document who serviced the wheel and when
Better habit: If a wheel comes loose after service, review the procedure before blaming the terrain. Most repeat loosening problems trace back to install quality, damaged parts, or missing follow-up checks.
If your fleet keeps seeing the same wheel position fail, stop accepting it as normal wear. Something in your process is broken.
How FieldFix Helps You Track Repeat Wheel Issues
Wheel hardware problems are easy to forget because each event looks small in isolation. One loose nut. One re-torque. One wheel-off near miss. Over six months, though, a pattern shows up.
That is where documentation stops being admin work and starts saving money.
In FieldFix, you can track:
- Wheel service dates and machine hours
- Which wheel position had the issue
- Torque checks and re-torque completion
- Hardware replaced during service
- Repeat failures tied to the same machine or crew
That record gives you something better than shop folklore. It gives you trend data. If one machine keeps loosening left-front hardware after brake work, or one trailer position keeps eating studs, you can see it fast and fix the process instead of paying for the same mistake again.
Stop Treating Wheel Torque Like a Small Detail
Loose wheel hardware turns into bent metal, lost time, and real safety risk faster than most fleets want to admit. FieldFix helps you log inspections, track repeat issues, and keep wheel service from disappearing into scattered notes and memory.
Related Articles
September 4, 2026
Heavy Equipment Fall Service Planning Guide: How to Prevent Winter Downtime

September 3, 2026
Horizontal Directional Drill Maintenance: The Complete HDD Service Guide for Contractors
September 2, 2026